> ## Documentation Index
> Fetch the complete documentation index at: https://docs.coloop.ai/llms.txt
> Use this file to discover all available pages before exploring further.
# Client Access
> Share a password-protected, chat-only view of your project with clients. Create branded access links so clients can explore your research through chat without needing a CoLoop account.
Client access lets you share a project with clients as a password-protected, chat-only page. Clients open a link, enter a password, and chat with your project's research data — useful for letting stakeholders explore insights themselves after you've delivered the findings. They don't need a CoLoop account, and they can't see anything else in your workspace.
You can also brand the client-facing page with a header image, a public project name, a heading, a description, and suggested prompts.
Client access is rolling out gradually. If you don't see it in your project
sidebar, contact support to have it enabled for your organization.
## Create an access link
You need permission to manage project members (for example, Project Admin) to set up client access.
1. Open your project and select **Client access** in the project sidebar.
2. In the **Access Links** tab, click **Create Access Link**.
3. Enter a **Label** to identify the link, such as the client's name.
4. Set a **Password**. It must be 8–128 characters. Clients will need it to open the link.
5. Click **Create**.
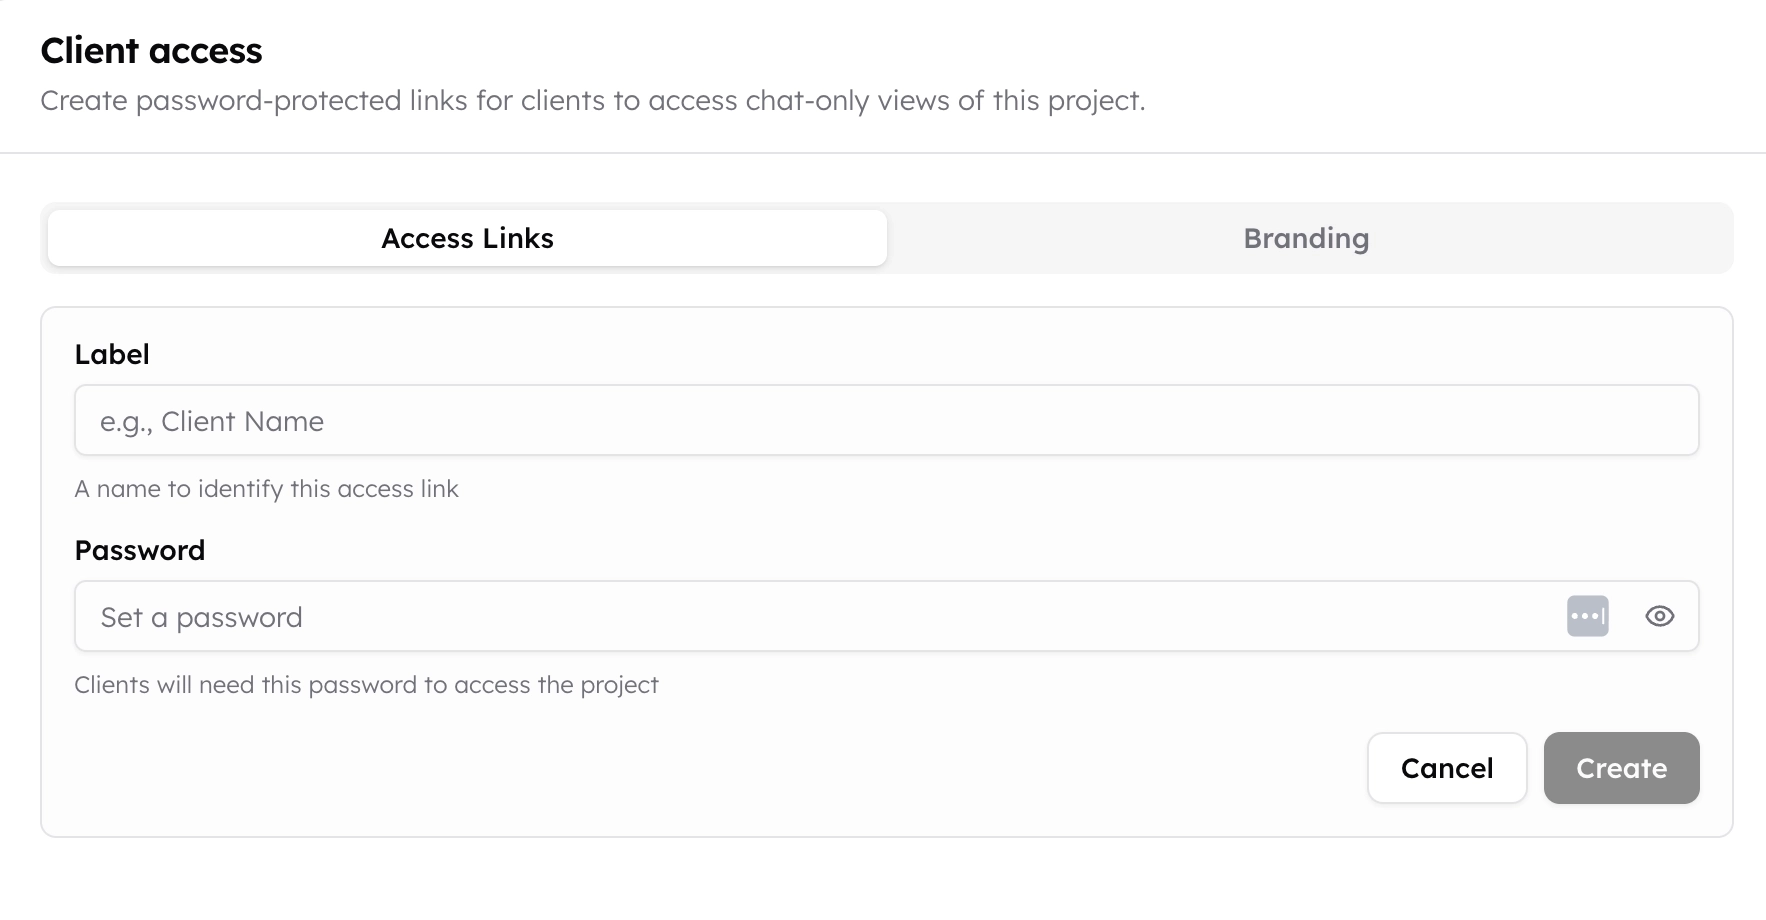 Click **Copy Link** on the new link card and send the link and password to your client. Share the password separately from the link, for example over a different channel.
Each link card shows when it was created, when it was last accessed, and how many times it has been opened.
## Manage access links
Open the **⋮** menu on a link card to:
* **Change Password** — set a new password for the link. This signs out anyone currently using the old password.
* **Revoke Access** — invalidate the link immediately and end any active client sessions. This cannot be undone; create a new link to restore access.
You can create as many links as you need, for example one per client, so you can revoke access for one client without affecting others.
## Brand the client experience
The **Branding** tab controls how the chat page looks to clients. A live preview on the right updates as you type.
Click **Copy Link** on the new link card and send the link and password to your client. Share the password separately from the link, for example over a different channel.
Each link card shows when it was created, when it was last accessed, and how many times it has been opened.
## Manage access links
Open the **⋮** menu on a link card to:
* **Change Password** — set a new password for the link. This signs out anyone currently using the old password.
* **Revoke Access** — invalidate the link immediately and end any active client sessions. This cannot be undone; create a new link to restore access.
You can create as many links as you need, for example one per client, so you can revoke access for one client without affecting others.
## Brand the client experience
The **Branding** tab controls how the chat page looks to clients. A live preview on the right updates as you type.
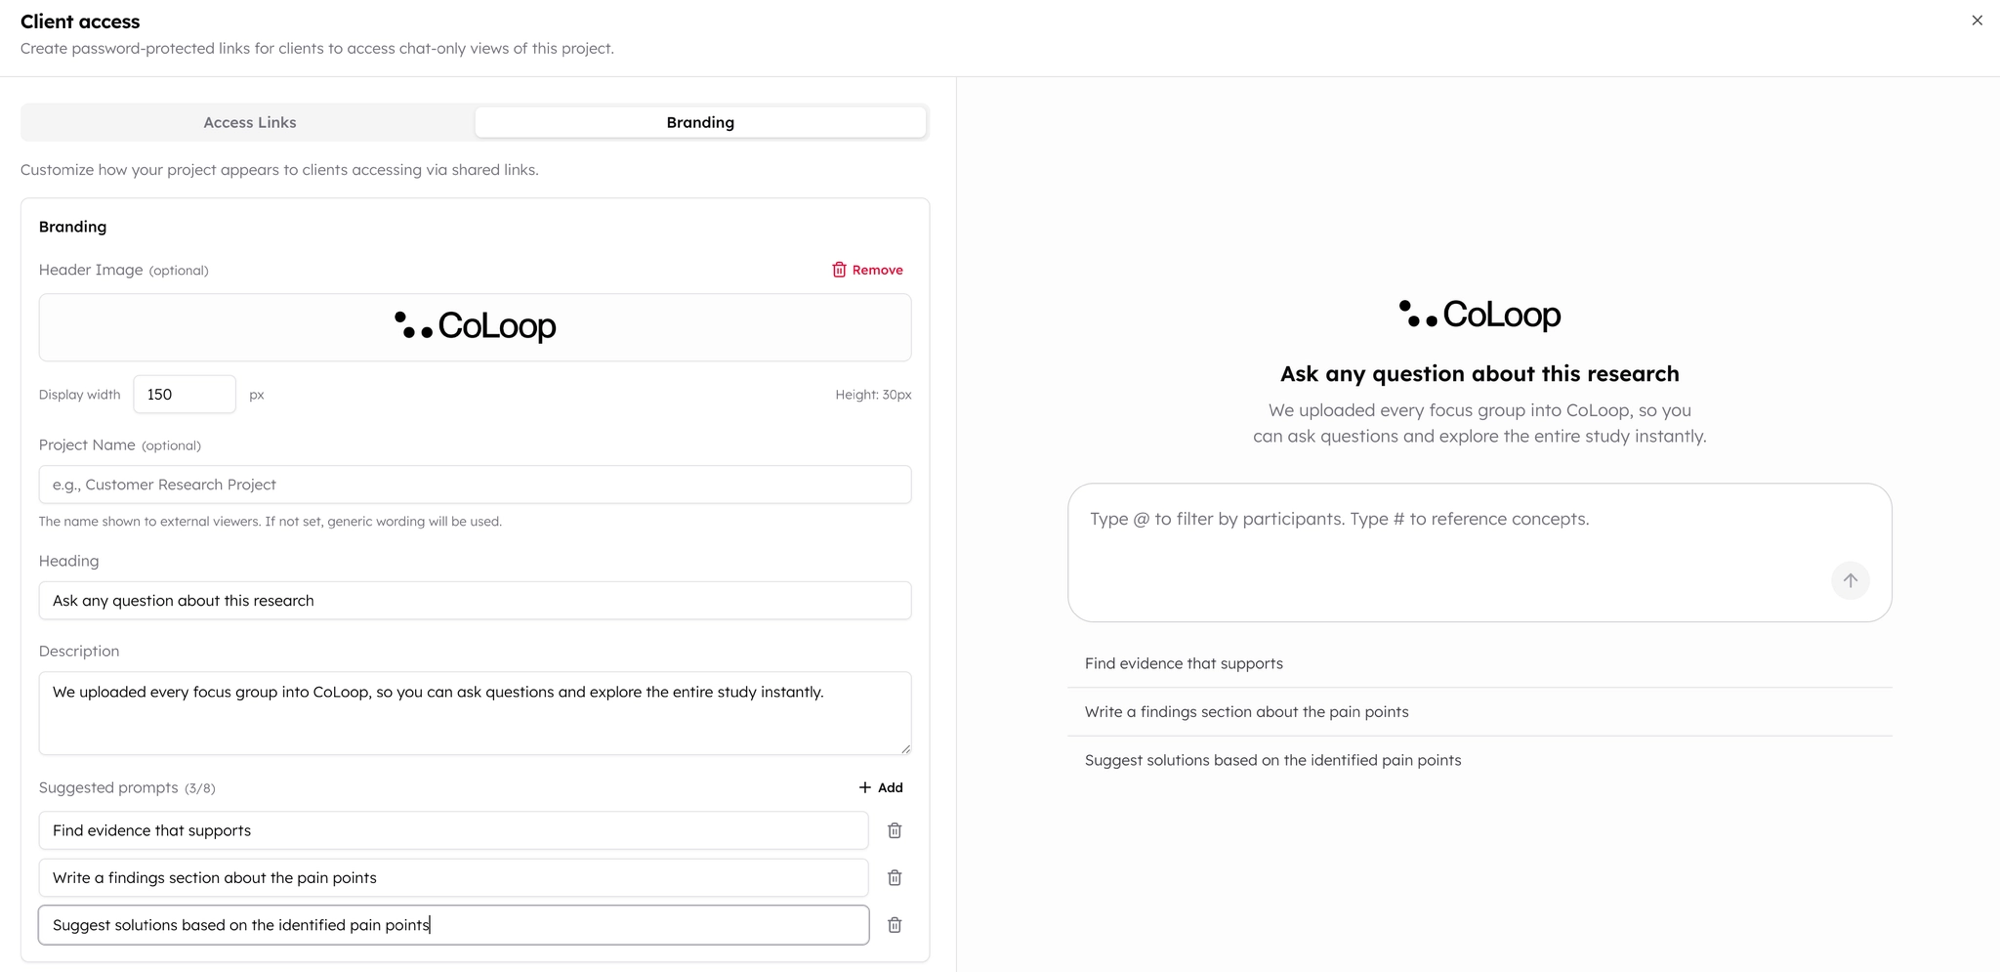 | Field | Required | Details |
| :-------------------- | :------- | :------------------------------------------------------------------------- |
| **Header Image** | No | PNG, JPEG, or WebP, up to 5 MB. Adjust the display width after uploading. |
| **Project Name** | No | The name clients see instead of your internal project name. |
| **Heading** | Yes | The headline on the chat page, up to 200 characters. |
| **Description** | Yes | A short explanation of what clients can ask about, up to 500 characters. |
| **Suggested prompts** | No | Up to 8 prompts shown as clickable suggestions, up to 300 characters each. |
Click **Save** to apply your changes. To revert to the default appearance, use **Remove branding**.
Your internal project name is never shown to clients. If you don't set a
public **Project Name**, generic wording is used instead.
## What clients see
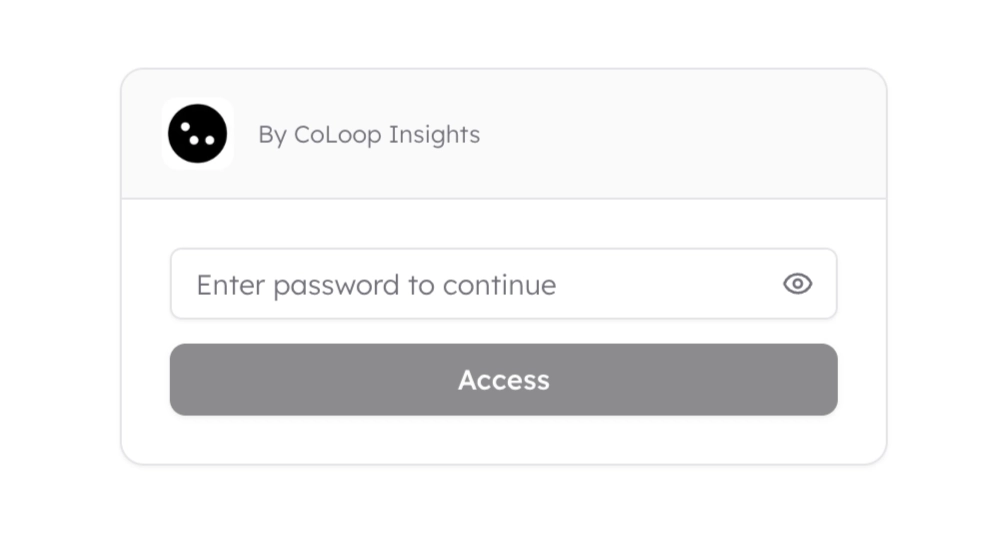
When a client opens the link, they see a password page with your organization's name and logo, and the public project name if you set one.
| Field | Required | Details |
| :-------------------- | :------- | :------------------------------------------------------------------------- |
| **Header Image** | No | PNG, JPEG, or WebP, up to 5 MB. Adjust the display width after uploading. |
| **Project Name** | No | The name clients see instead of your internal project name. |
| **Heading** | Yes | The headline on the chat page, up to 200 characters. |
| **Description** | Yes | A short explanation of what clients can ask about, up to 500 characters. |
| **Suggested prompts** | No | Up to 8 prompts shown as clickable suggestions, up to 300 characters each. |
Click **Save** to apply your changes. To revert to the default appearance, use **Remove branding**.
Your internal project name is never shown to clients. If you don't set a
public **Project Name**, generic wording is used instead.
## What clients see
When a client opens the link, they see a password page with your organization's name and logo, and the public project name if you set one.
 After entering the password, they land on the chat page with your header image, heading, description, and suggested prompts.
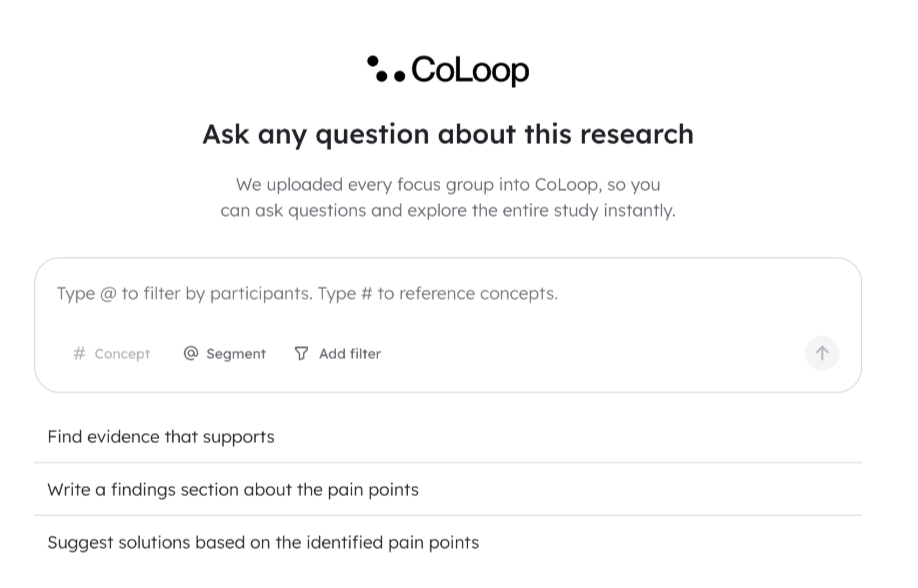 Clients can ask questions and get answers grounded in the project's research data, the same way chat works elsewhere in CoLoop, and trace insights back to the verbatim evidence behind them.
Clients cannot:
* Open raw files, transcripts, or analysis grids
* See your other projects, project members, or settings
* Navigate anywhere in your workspace beyond the chat page
A client's session lasts 24 hours; after that they re-enter the password. Password attempts are rate-limited to protect against guessing.
## Client access vs. guest access
Use client access when a client should only chat with the project's data, with no account setup. Use [guest access](/docs/collab-and-access-management/guest-access) when an external collaborator needs a CoLoop account with fuller project access, such as viewing evidence, making clips, or editing grids.
Clients can ask questions and get answers grounded in the project's research data, the same way chat works elsewhere in CoLoop, and trace insights back to the verbatim evidence behind them.
Clients cannot:
* Open raw files, transcripts, or analysis grids
* See your other projects, project members, or settings
* Navigate anywhere in your workspace beyond the chat page
A client's session lasts 24 hours; after that they re-enter the password. Password attempts are rate-limited to protect against guessing.
## Client access vs. guest access
Use client access when a client should only chat with the project's data, with no account setup. Use [guest access](/docs/collab-and-access-management/guest-access) when an external collaborator needs a CoLoop account with fuller project access, such as viewing evidence, making clips, or editing grids.