

- A stimulus deck exported as a PDF, exactly as you showed it.
- Video recordings where that deck is visible on screen. Full-screen is ideal but not required: detection still works with a facecam overlay or if you scroll the slide.
Set up your project
Concept testing isn’t a toggle or a project type. It switches on as soon as your project has concepts, and you add those in the project setup flow. When you create a project, CoLoop walks you through a short series of setup steps. Which steps you see depends on your project, but the two that matter here are Concepts and Stimulus deck, and they come in that order: the deck step only appears once you’ve saved at least one concept.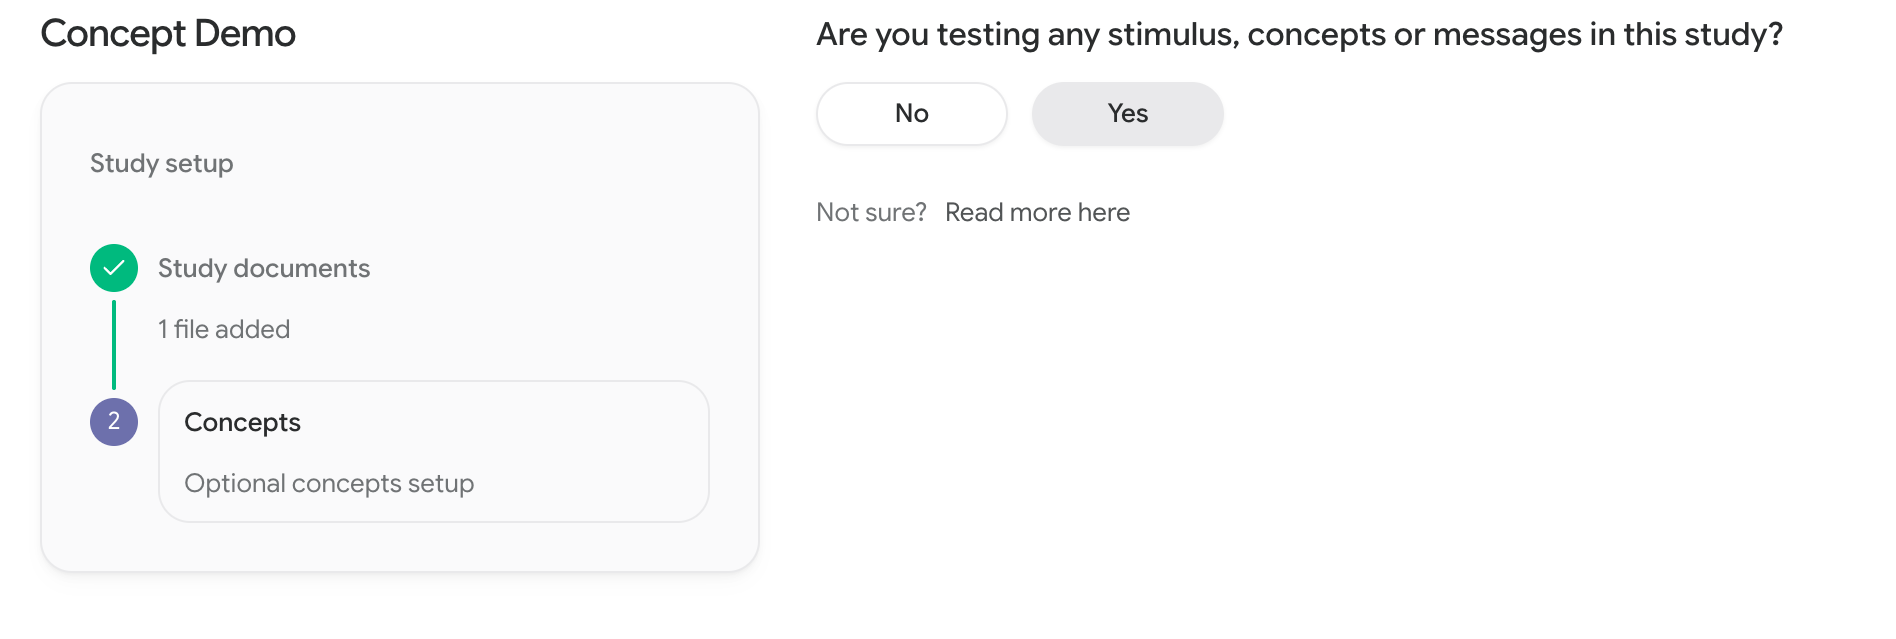 You don’t have to do this at creation time. You can add or change concepts later from the project sidebar using Add concepts / Edit concepts.
Add your concepts
In the editor, each concept has three parts: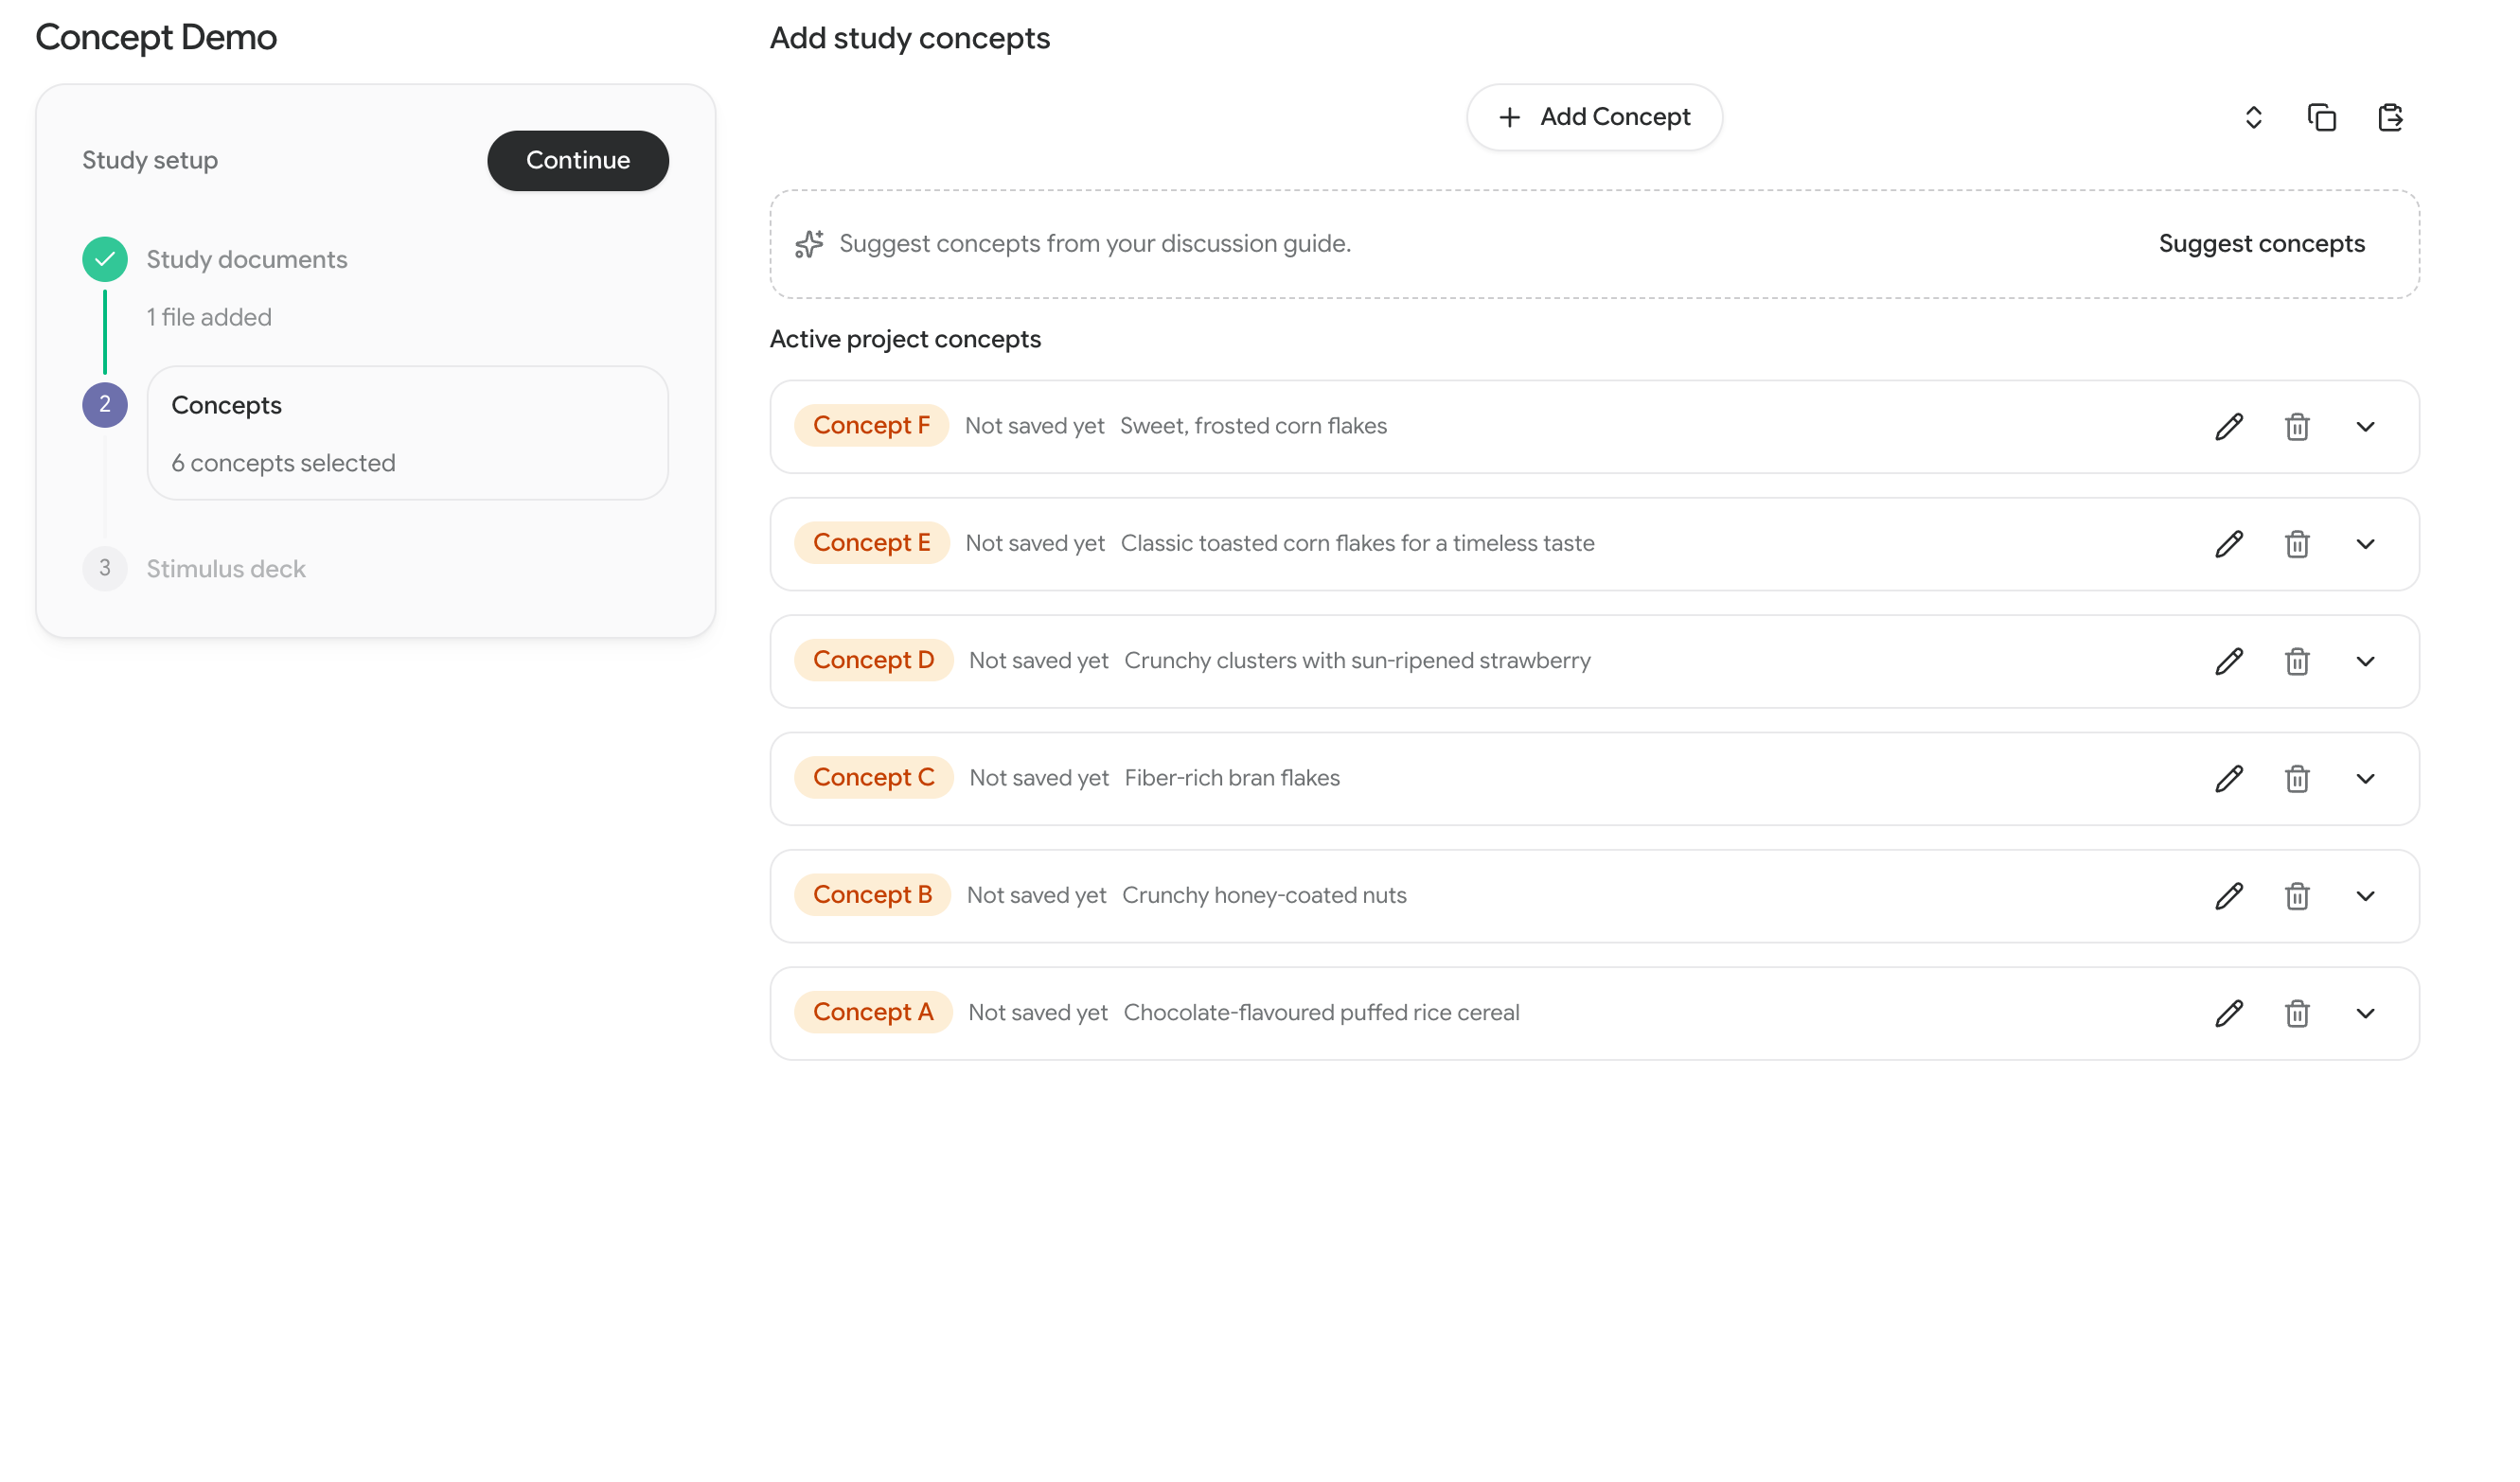 A few things that make the editor faster on larger studies:
- Expand all / Collapse all to work through a long list.
- Copy concepts to clipboard and Paste concepts from clipboard to move a concept set between projects, or to build it in a spreadsheet first.
Suggested concepts
If you uploaded a discussion guide in the Study documents step, CoLoop reads it and suggests concepts for you. You’ll see “Reading your discussion guide…” while it works, and the suggestions appear shortly after. Suggestions come with a name and a definition already drafted. Add the ones you want, edit them as you like, and ignore the rest. Nothing is added to your project until you accept it.Suggestions are a starting point, not a final concept list. Always check them against what you actually showed participants, especially the definitions, which CoLoop uses when deciding what to tag.
Upload and label your deck
Prepare the deck
One concept per slide wherever possible. CoLoop detects which slide is on screen, not which part of a slide a participant is talking about. A slide can carry several concepts if it has to (see below), but the cleanest results come from one concept per slide. For slides that show several concepts, such as a comparison slide, consider creating a separate concept instead of tagging the slide with each one. For example, rather than tagging a comparison slide with Alpha and Beta, create an Alpha Beta comparison concept that you can reference directly in your analysis. Small differences between slides are fine. Detection matches each whole slide as an image, so it can reliably tell apart slides that differ only by a small detail, such as a single number or a swapped word. That means you can test subtle variations, like small changes to a message or design. Export as PDF, exactly as shown. Don’t re-style or tidy up the slides afterwards. CoLoop matches your recordings against these exact slides, so the deck you upload has to be the deck participants saw. Running in more than one language? Upload a deck for each language you presented in, and use the same concept labels on every version so results combine across markets. Pick the matching deck when you transcribe each language’s videos.Upload
The Stimulus deck step asks “Did you use a stimulus deck, and will you be uploading video files which show this stimulus deck on screen?” Choose Yes to open the upload area.- Drag your PDF into Upload stimulus deck(s), or click to choose a file.
- Expand the deck to preview it and check the slides came through correctly, then press Confirm.
- Use Add another deck if your study has more than one. Confirm each one.
- Press Continue.
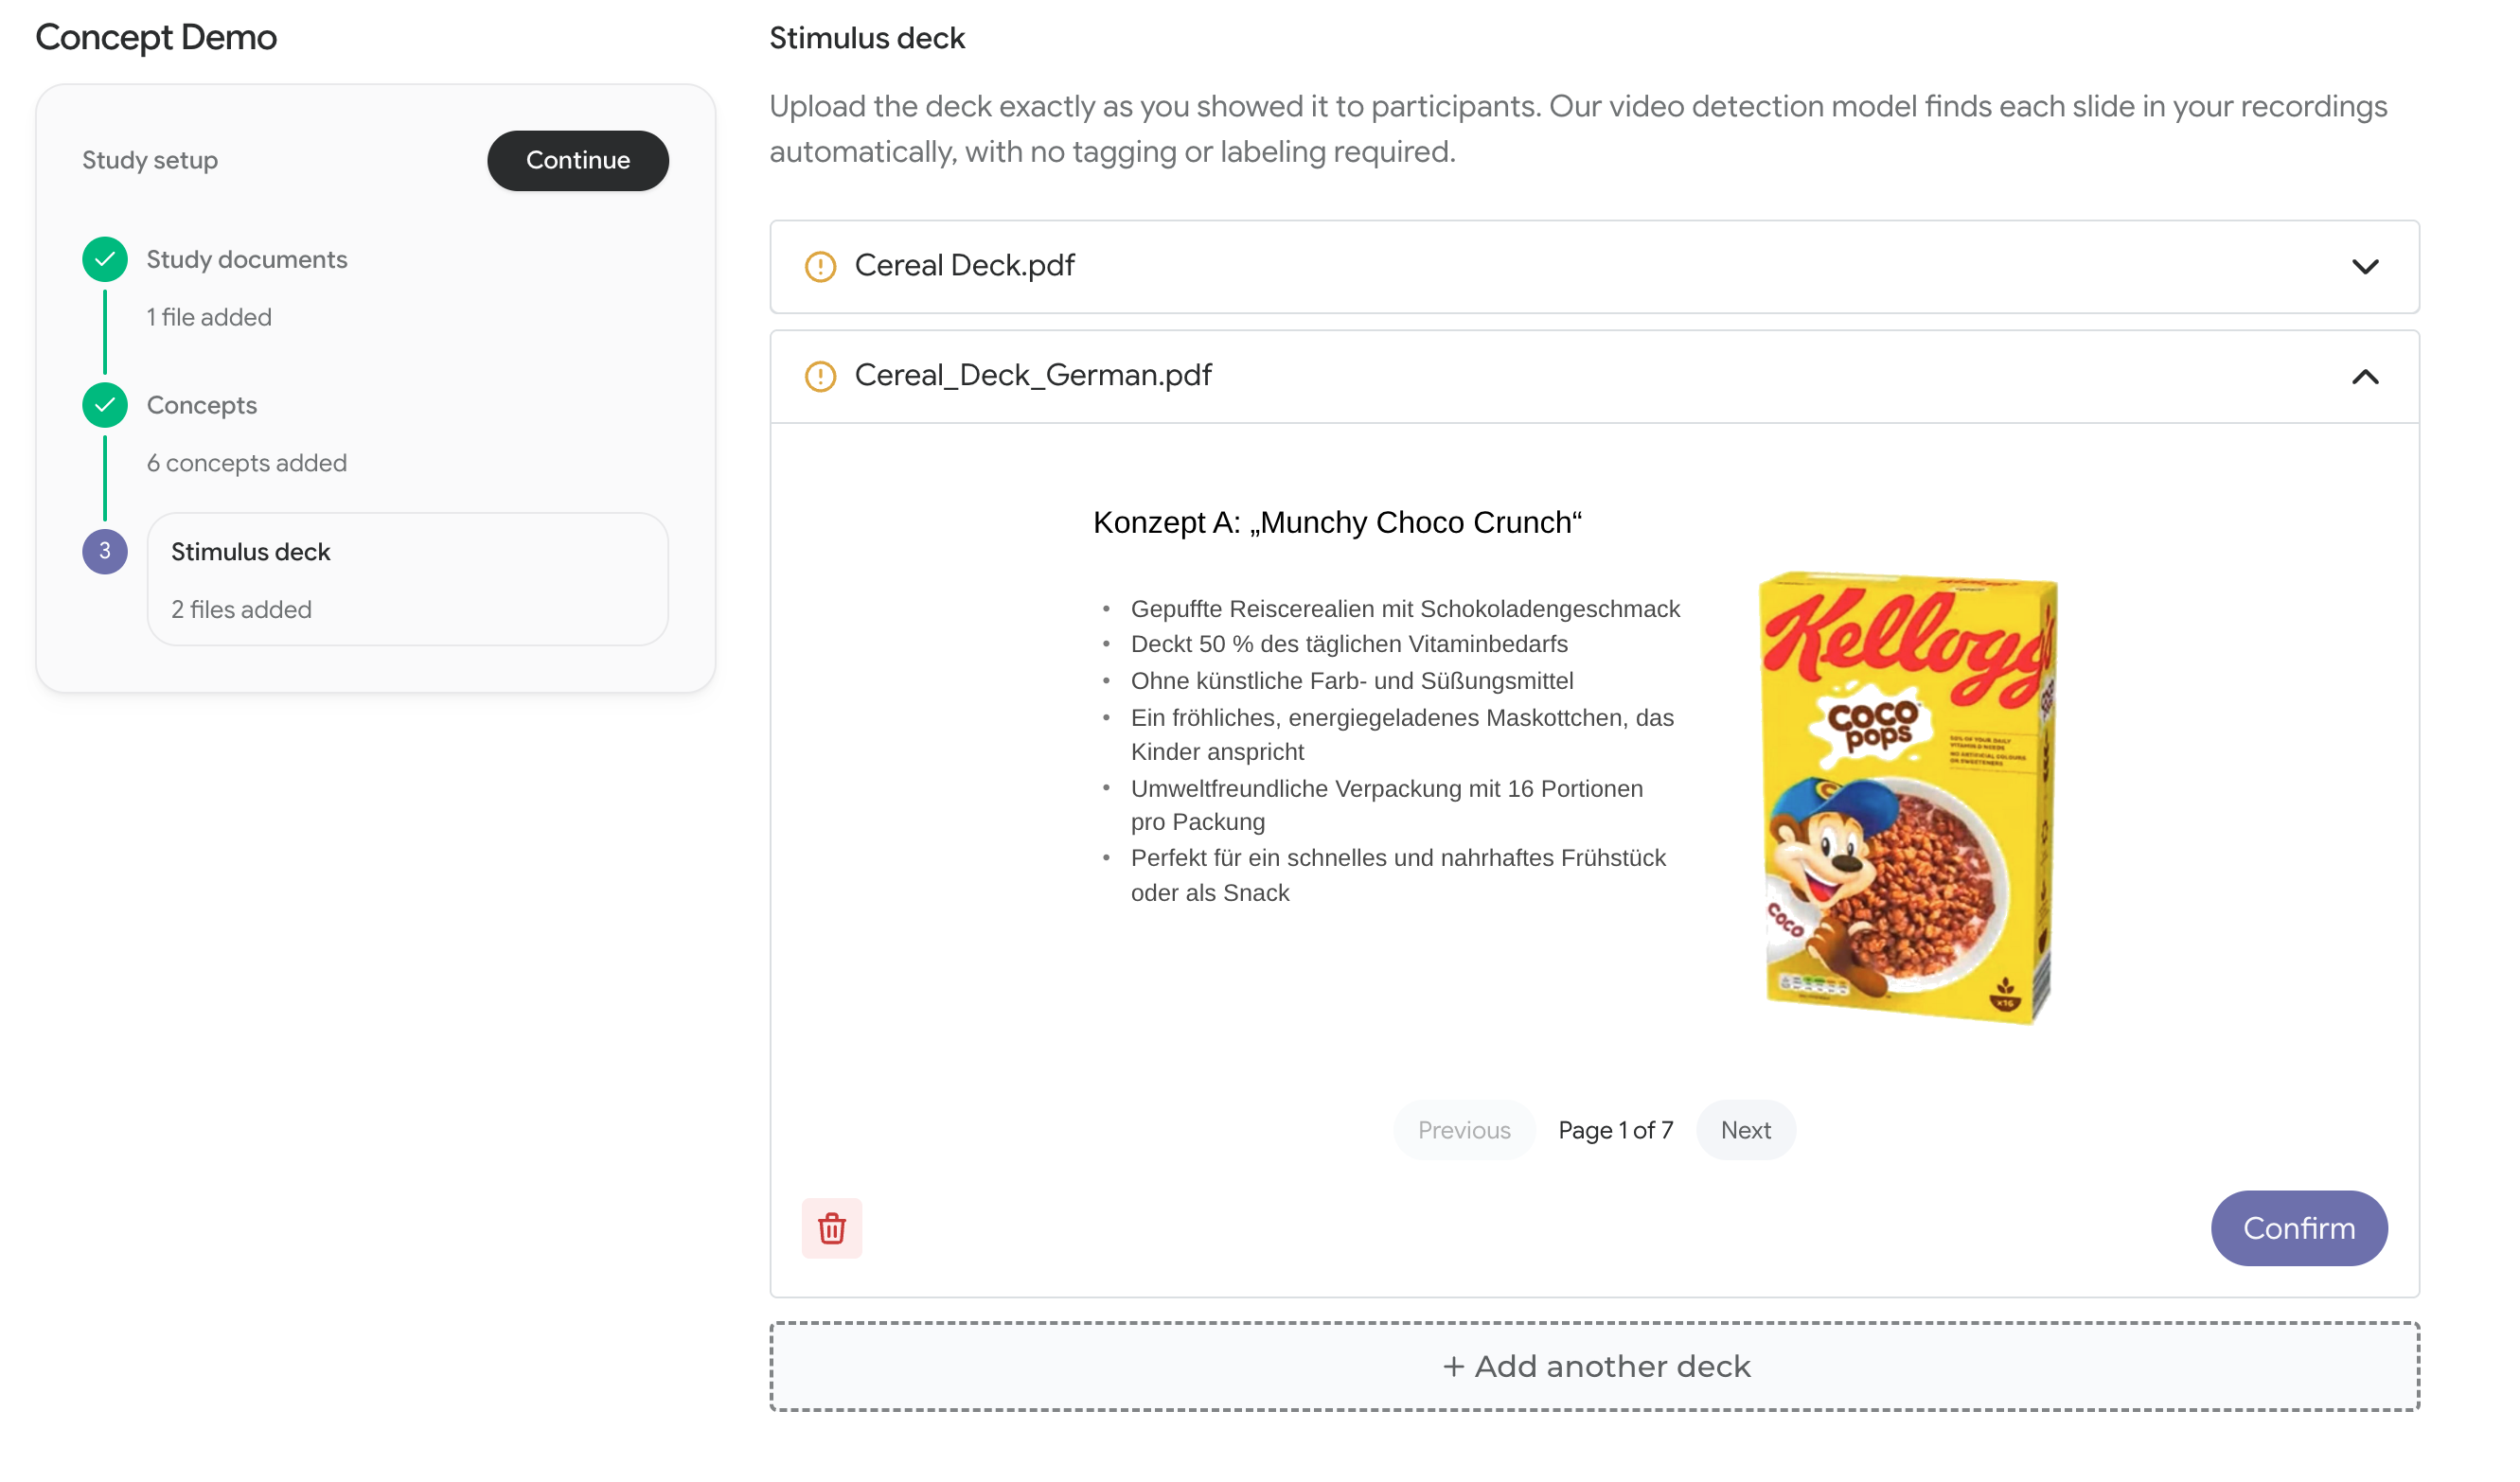 You can upload as many decks as you need, and you can add another deck later if your stimulus changes partway through fieldwork.
Add a deck to an existing project
If your project already exists, you don’t need to go back through setup. Add the deck from the Files & participants tab:- Click Import files.
- Under Concept testing at the bottom, choose Slide deck (pdf) and upload your deck.
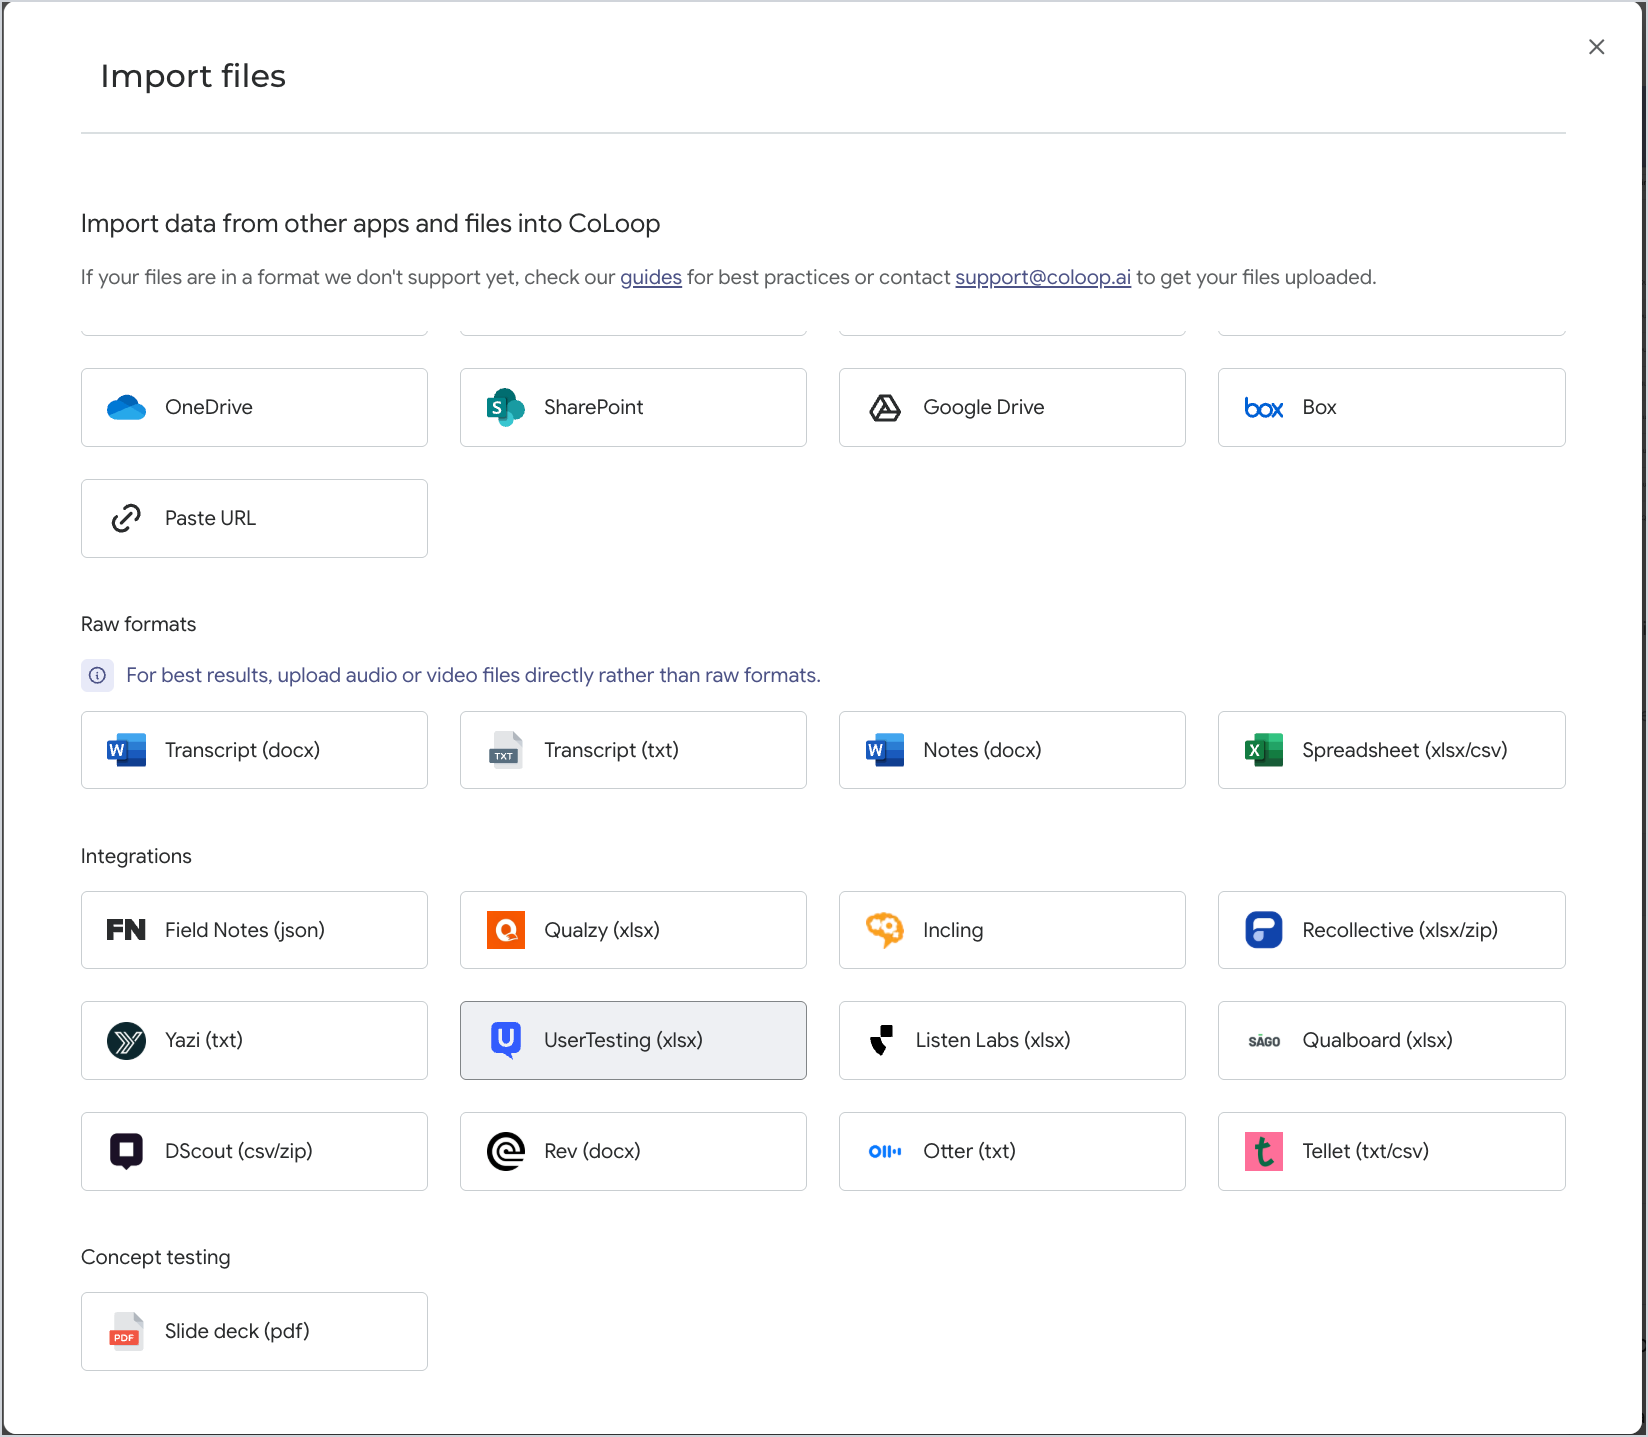 The deck processes in the Files list, showing Processing presentation slides… while it works.
 When the status changes to Requires concepts review., review the labels (next section).
Review the slide labels
Once a deck is uploaded, CoLoop reads it and matches your project concepts to the slides they appear on. When that finishes, the deck appears in your Files list with a Requires concepts review. warning and a Complete button. Review the labels before you transcribe your videos. These slide labels are what detection applies to your transcripts, so a mislabelled slide becomes a mistagged transcript.
Pressing Complete opens Label stimulus deck. Go through each slide and add the concepts shown on it. Press Save & complete when you’re done.
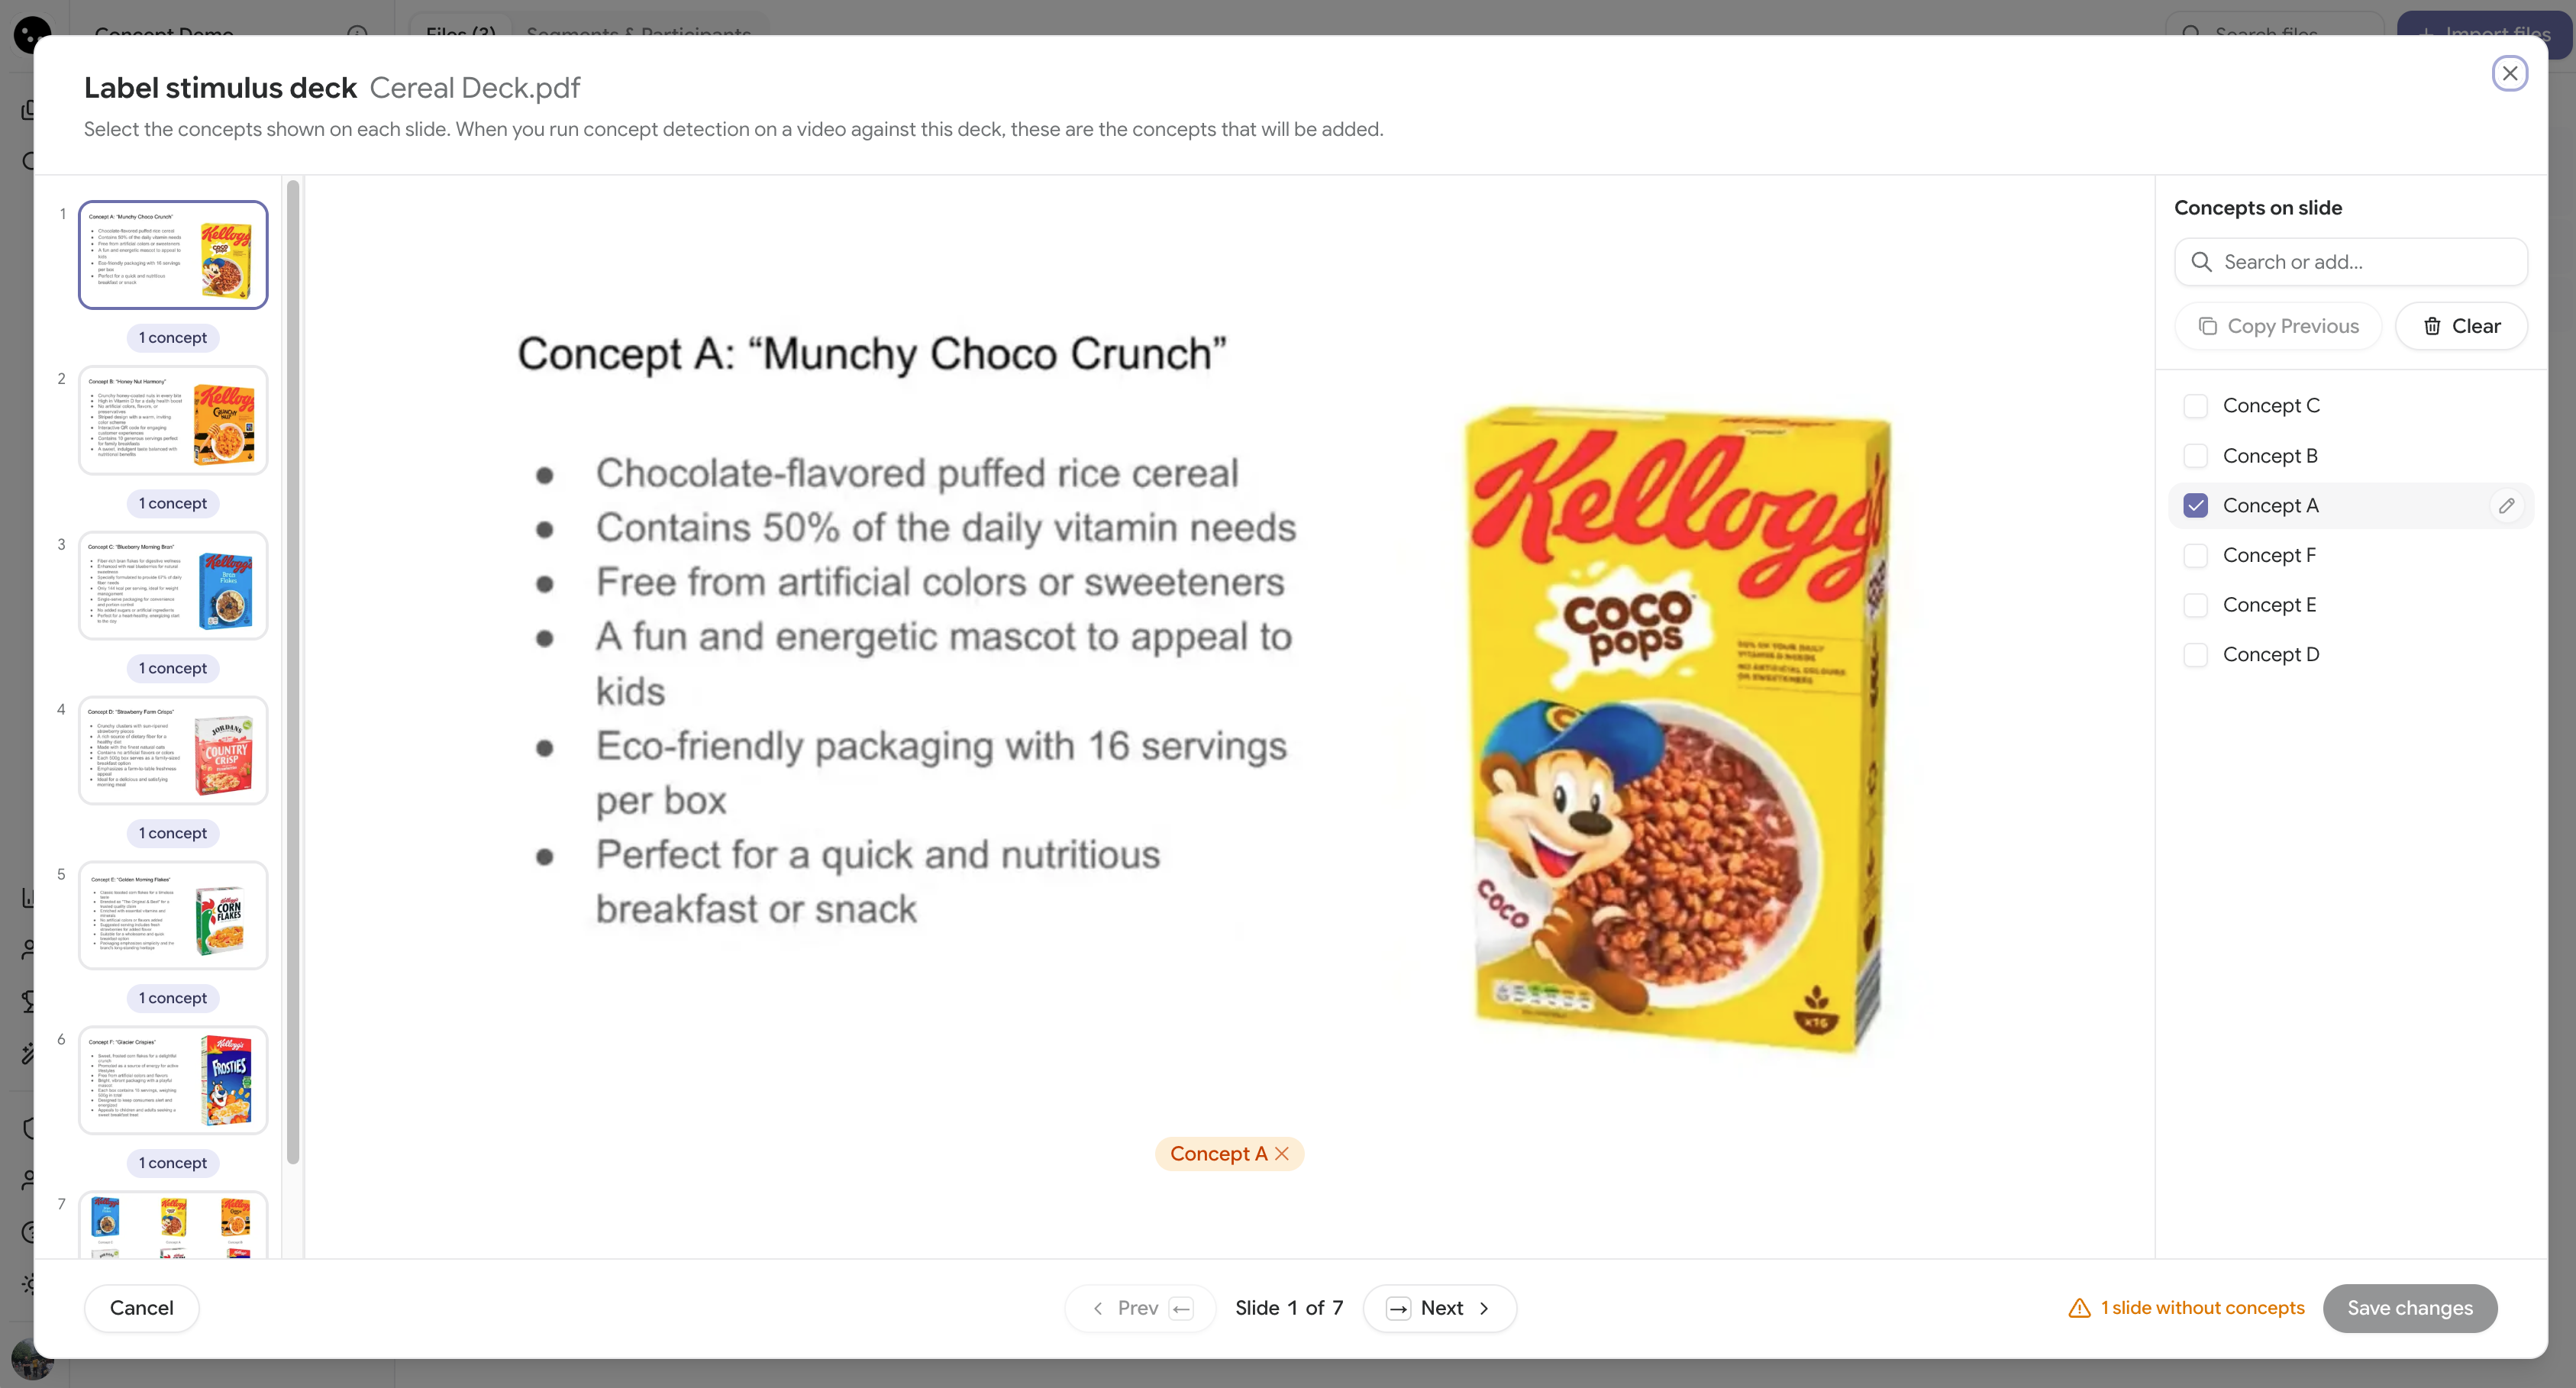
Not every slide needs a concept. Intros, warm-ups and dividers can be left blank.
Run detection on a video
When you add a video, you tell CoLoop which deck to match it against, and detection runs automatically. You can follow its progress in the Files list.New videos
Upload and transcribe the video as usual. In the Transcription options dialog, scroll to the Concept testing section and choose the deck under Select a presentation used for concept testing. Pick the deck that was on screen in that recording. CoLoop remembers your last choice for a file, and warns you if you continue without selecting one.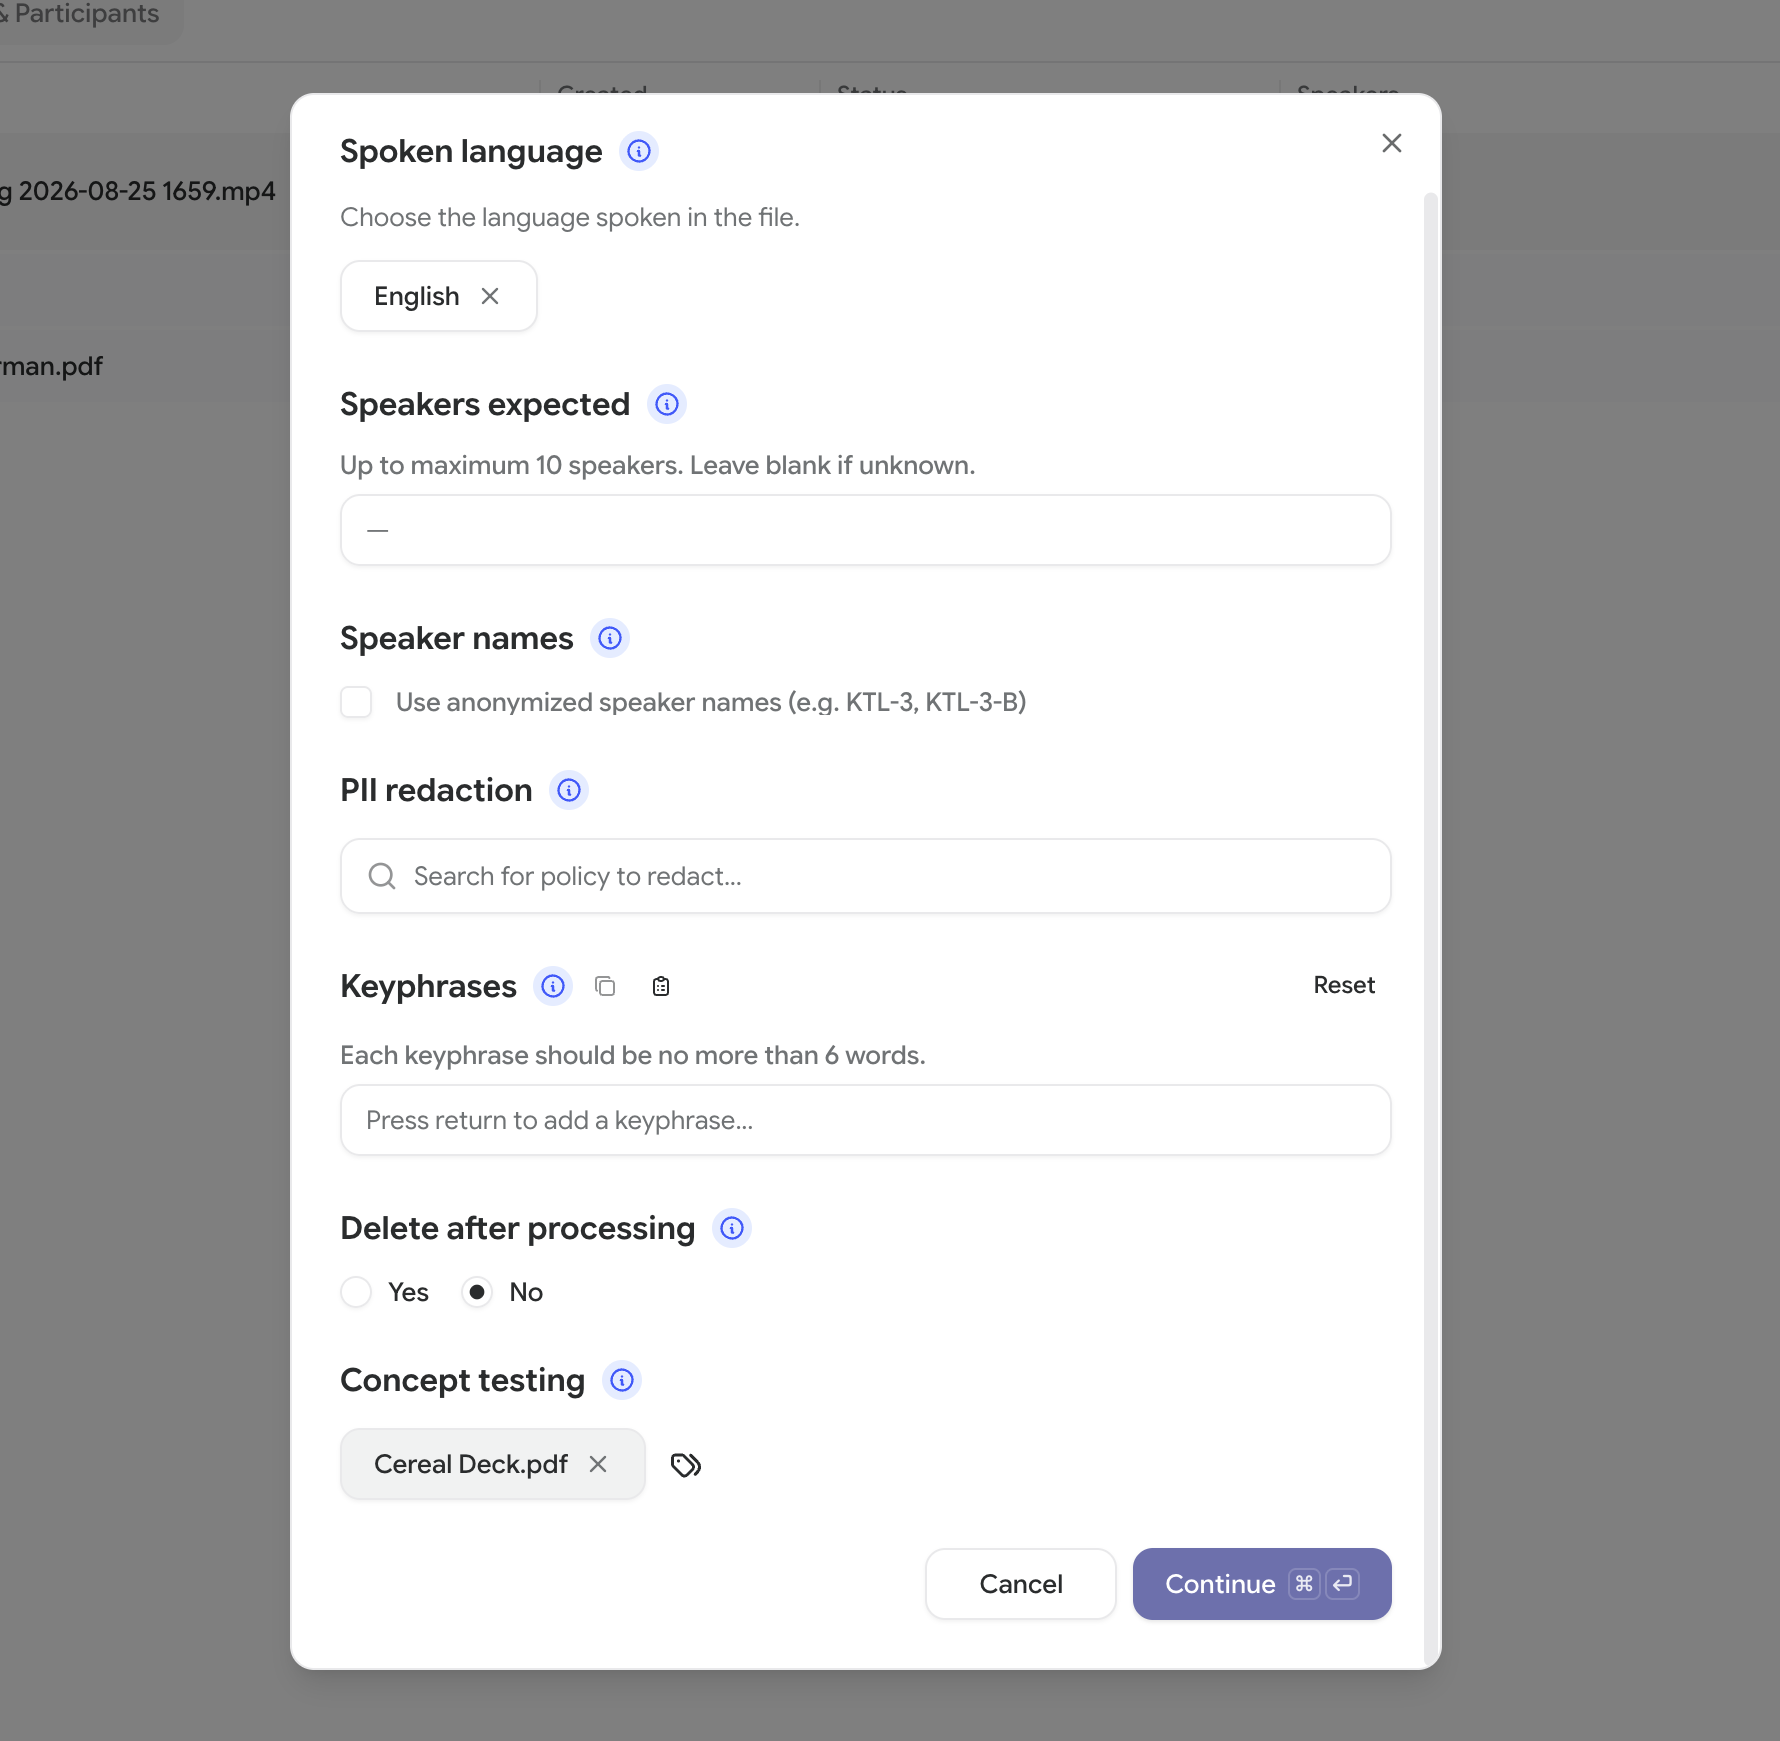 Set your language and expected number of speakers as usual, then transcribe. Confirm speaker identities when it completes.
Videos you’ve already uploaded
-
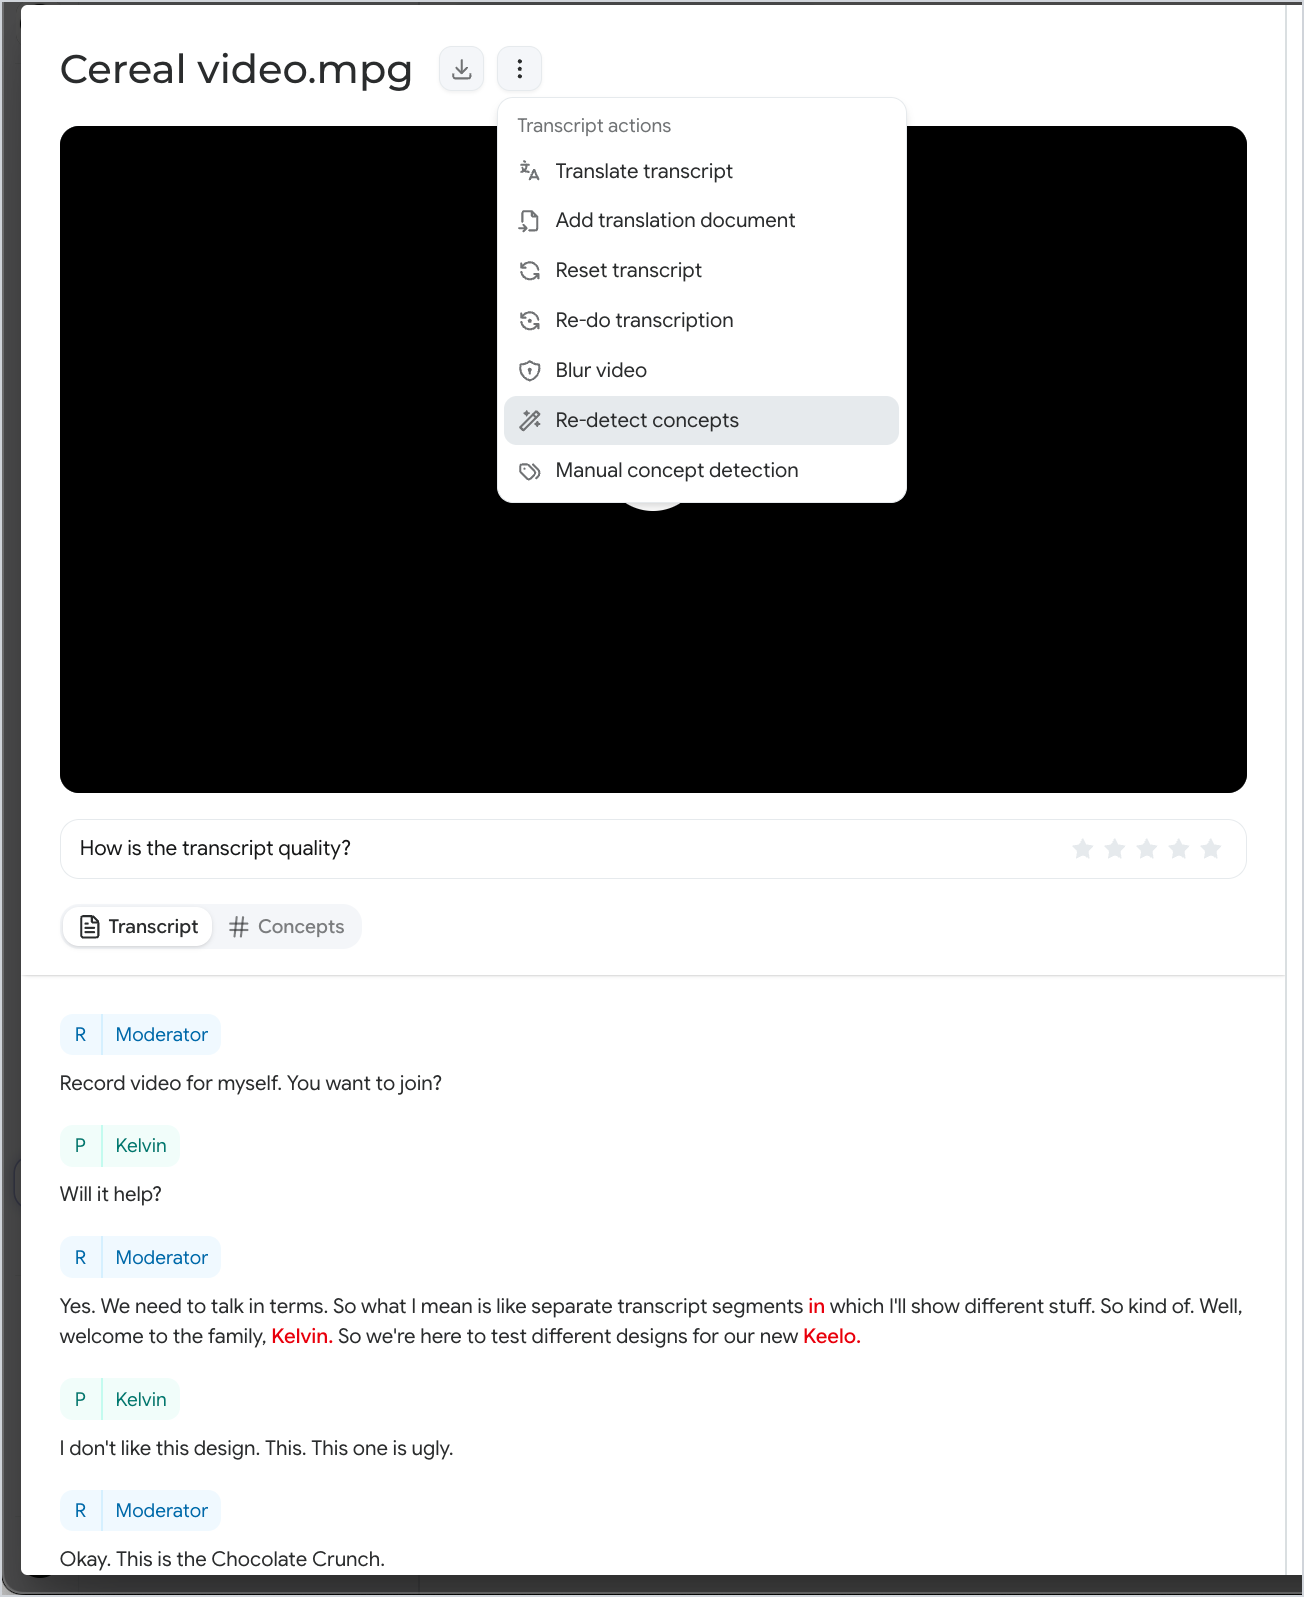
Open the video’s transcript, click the more options menu (the three dots next to the file name) and choose Re-detect concepts.
-
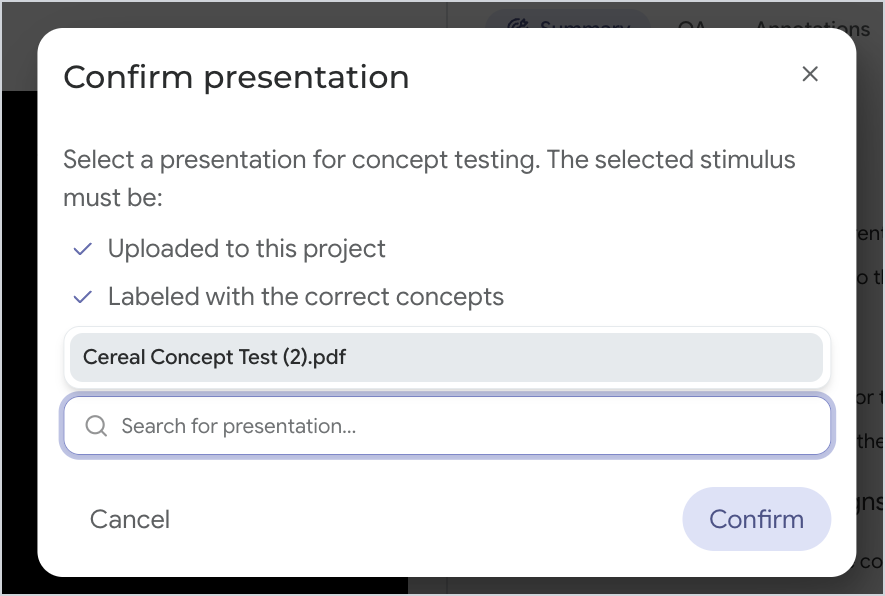
In the Confirm presentation dialog, select your labelled deck and click Confirm. The deck must be uploaded to this project and labelled with concepts.
Check the concepts timeline
Open a transcript and go to the Concepts tab to see the Concepts timeline, one row per concept, showing when in the session each one was on screen or being discussed. Click anywhere on a row to jump the transcript to that moment.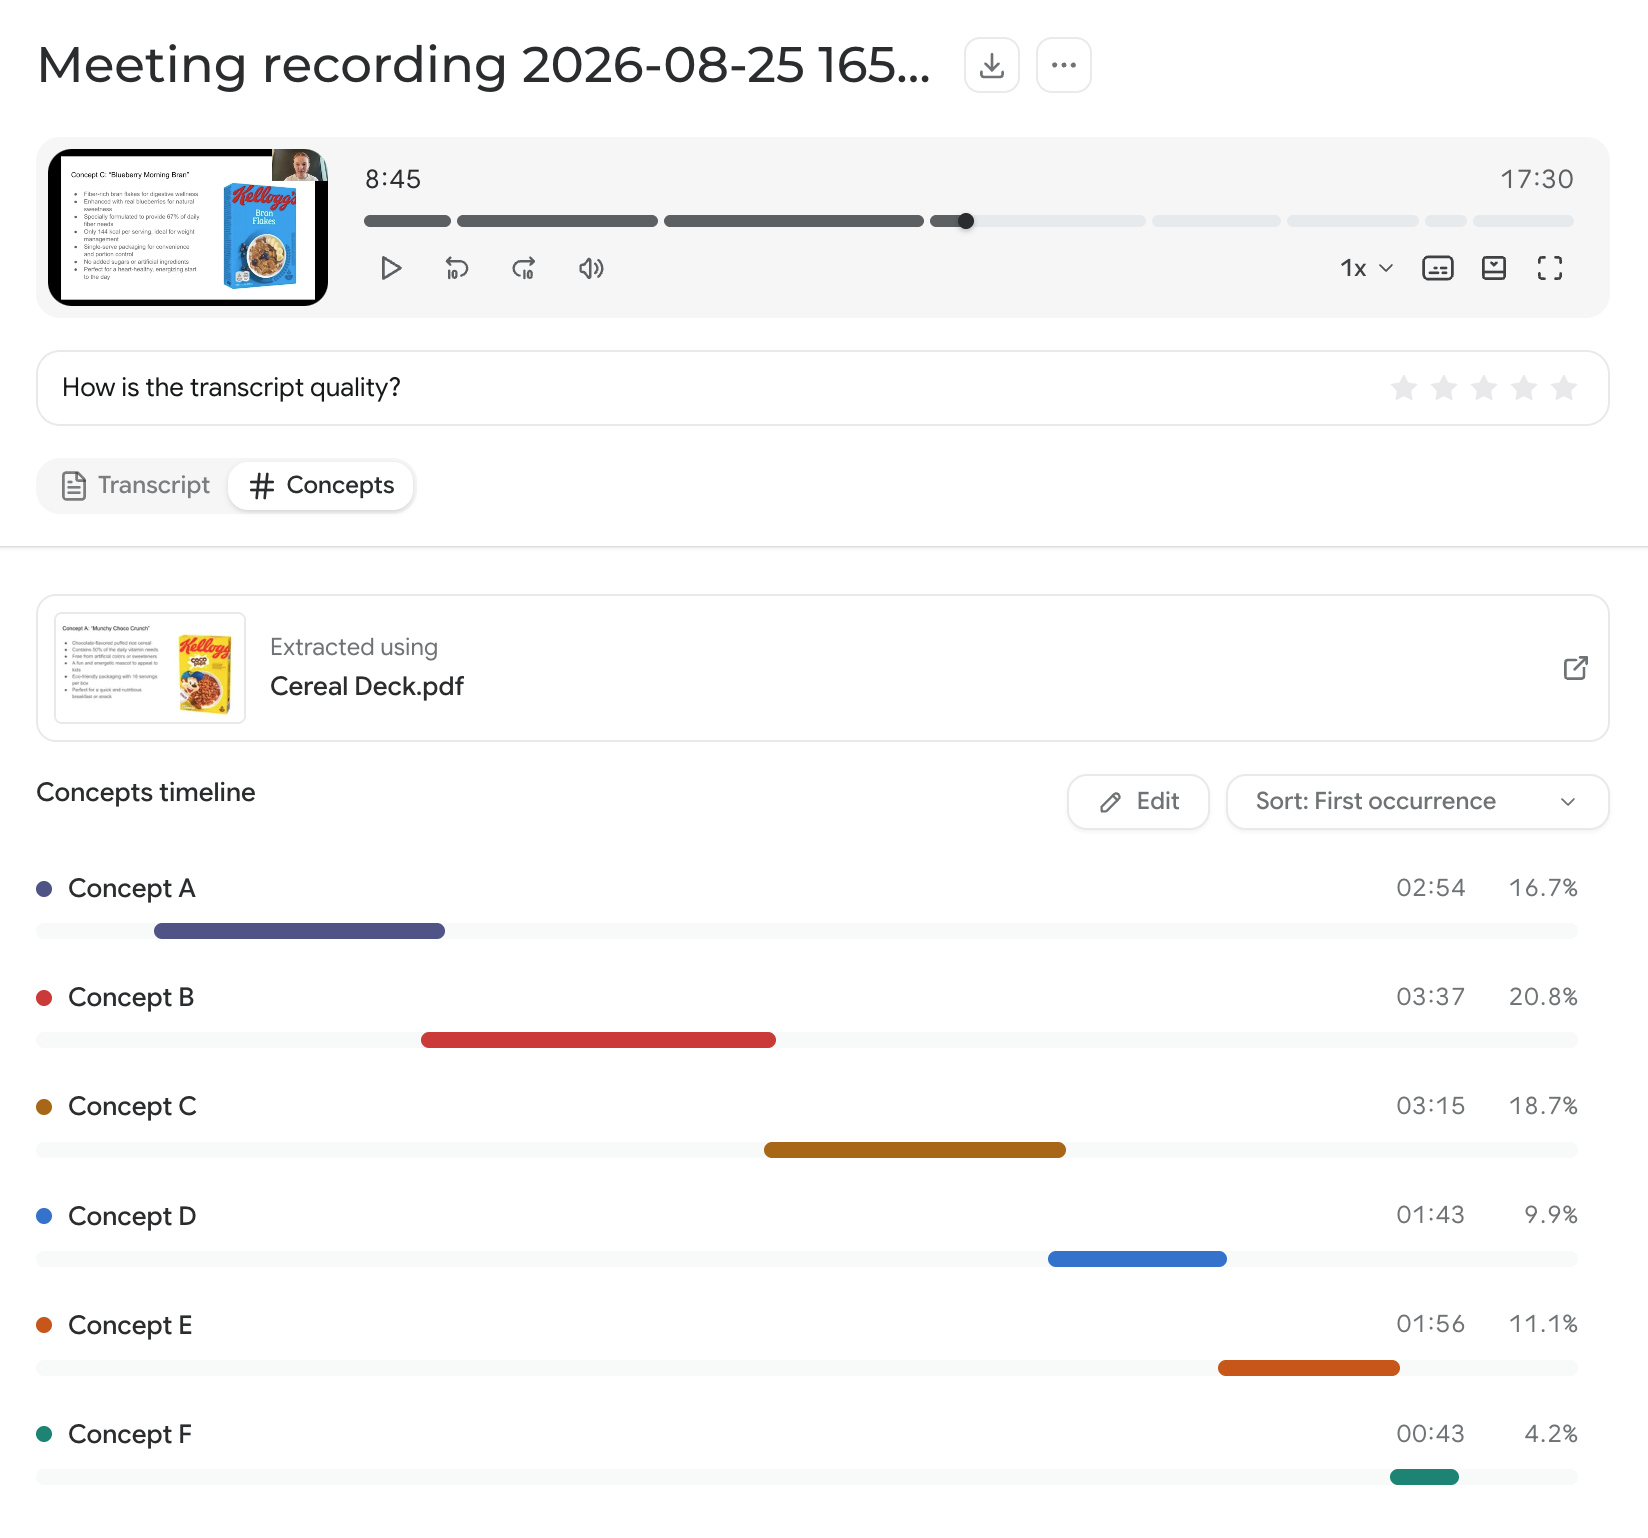 While detection is running or if it didn’t find anything, the tab tells you where things stand:
Edit concepts
Detection gets you most of the way there. You can fix anything it got wrong on the timeline or in the transcript.On the timeline
Press Edit on the Concepts timeline to go into edit mode. From there you can:- Drag on a concept’s row to mark the stretch of the session where it applies.
- Adjust or remove a span.
- Press Add Concept to bring another concept onto the timeline. Once every project concept has a row, this reads All concepts are on the timeline.
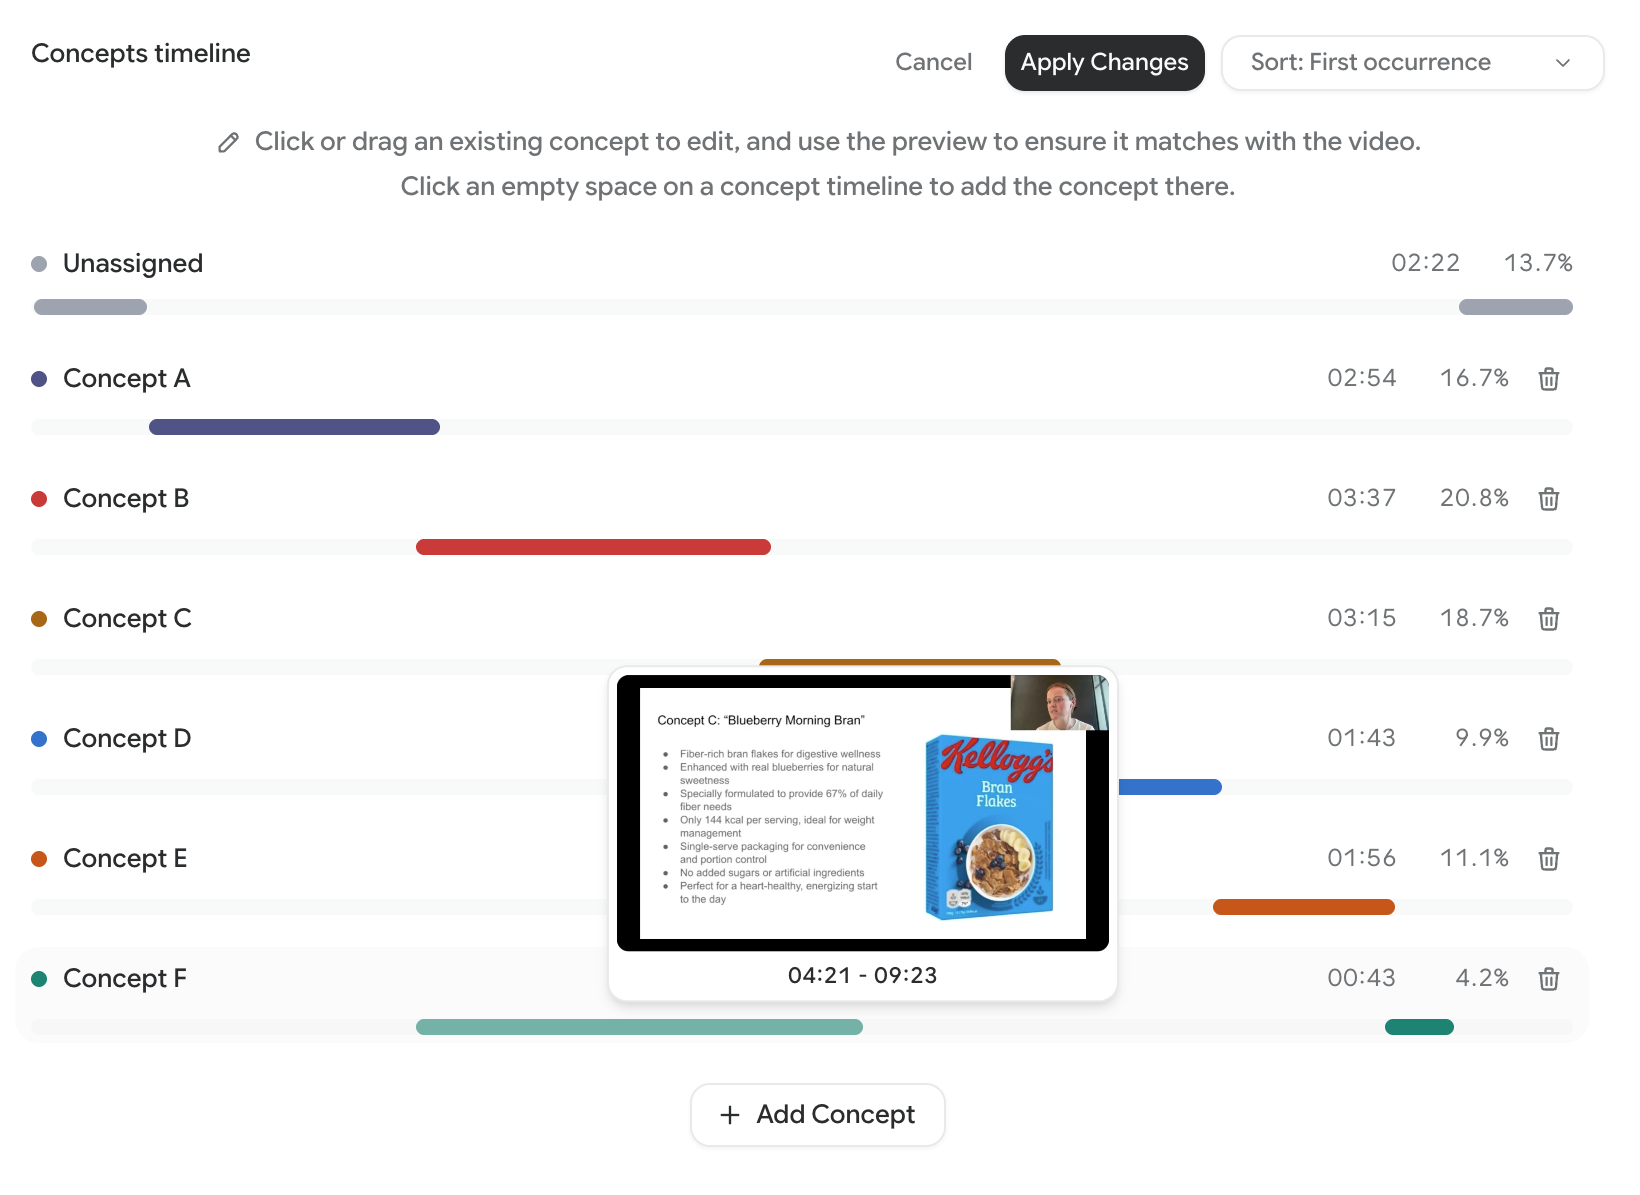
Re-running detection on a file replaces everything on the timeline, including your manual edits, so make your corrections once detection has finished and you’re happy with the deck labels.
In the transcript
You can also tag directly in the transcript. Highlight the segments you want, press + Add concept, choose the concept and confirm. The same flow works in reverse for removing a concept from a run of segments. This is useful for picking up asides, such as a participant circling back to an earlier concept long after that slide left the screen.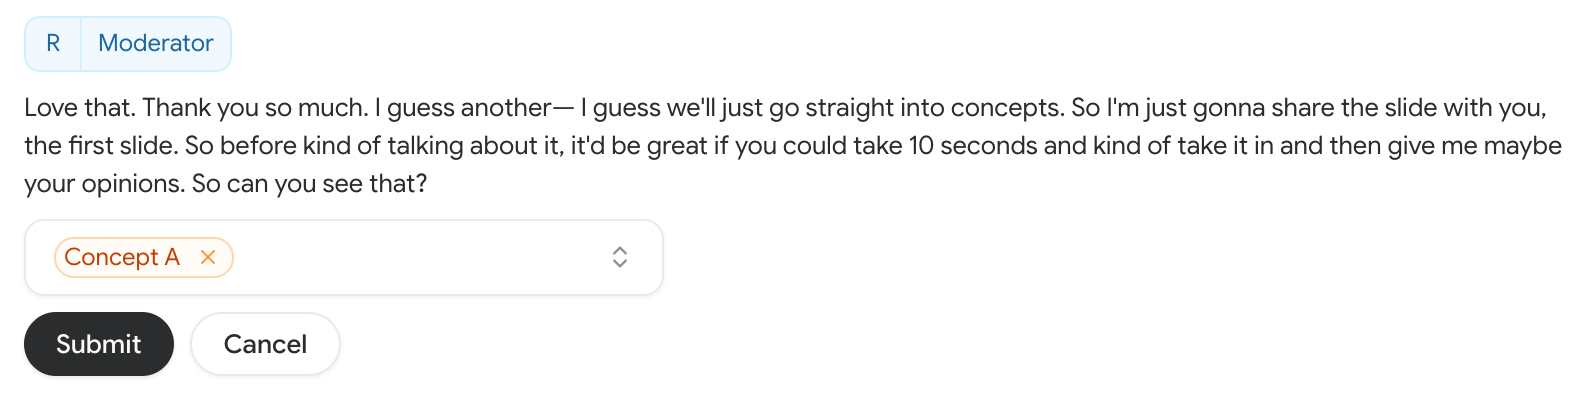
Changing your project concepts
Edit the project’s concept list any time from the project sidebar via Edit concepts.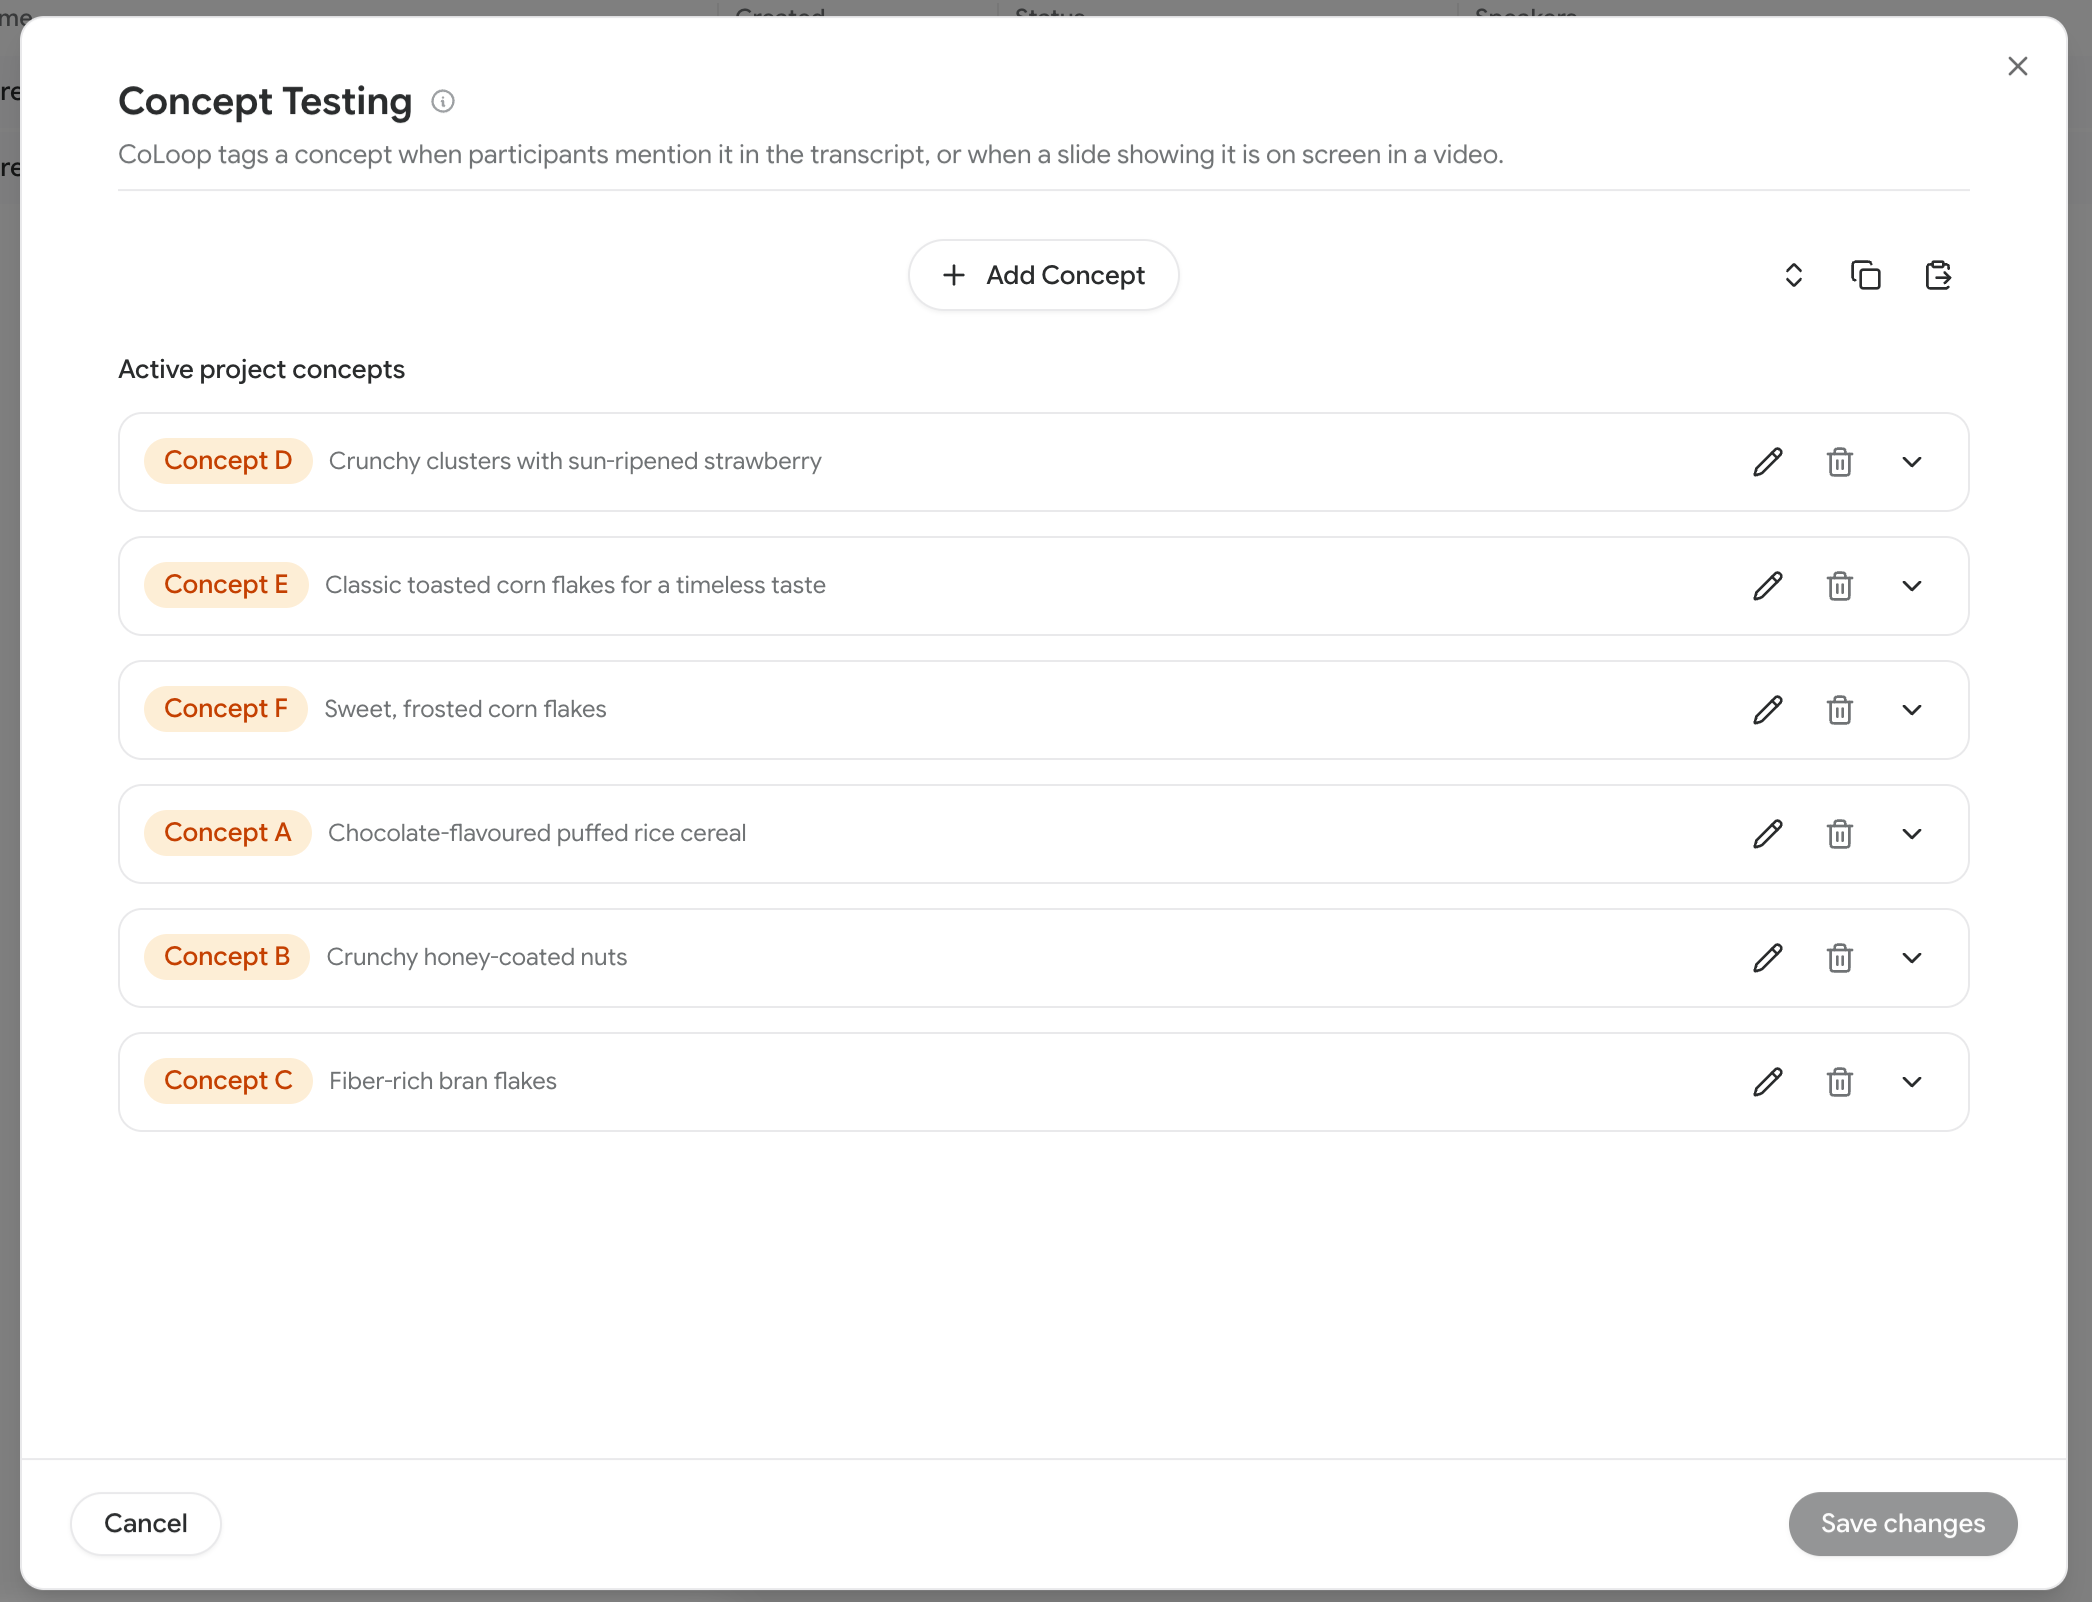
Troubleshooting
If concepts are missing or mislabelled:- Slides are hard to see. Detection relies on the slide being clearly visible. Small or blurry screen shares may not match. A facecam overlay or briefly scrolling the slide is fine.
- A deck version is missing. Every version shown in your sessions, including translations, must be uploaded and labelled.
- Labels changed after processing. Run Re-detect concepts on the transcript to apply the new labels.