Learn how to generate audio and video clips directly from transcripts using CoLoop. Stitch audio and video clips together across all project files into a single, shareable, reel and export them for sharing. Clips and reels are an easy way to incorporate authentic participant voices into strong deliverables, presentations, and narratives.
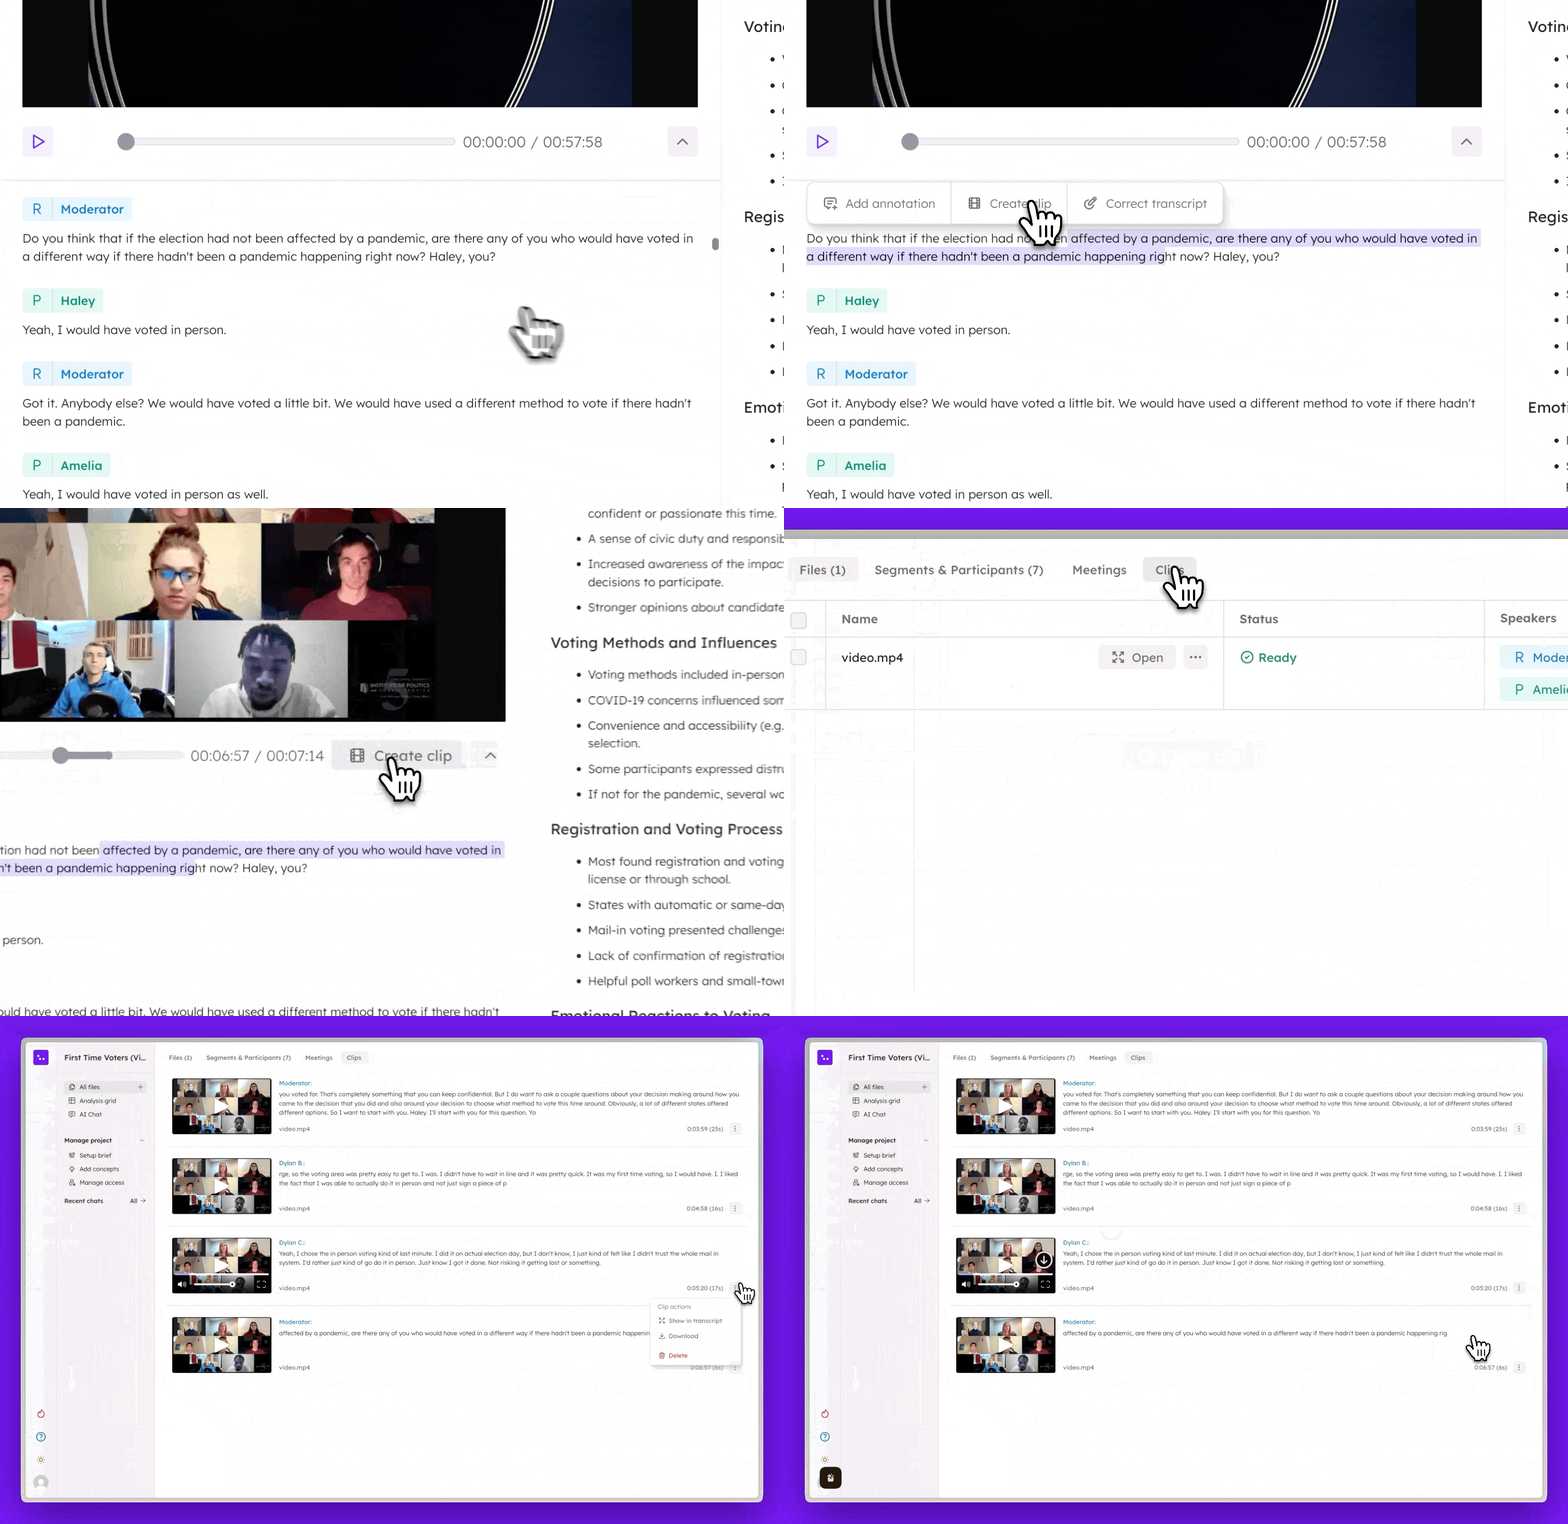
CoLoop supports audio and video clip generation directly from transcripts. Find all your clips in two dedicated sections within each project: file-specific clips appear on the right-hand side of the file view, while all clips from all uploaded files can be found in the Clips & reels section in the left-hand sidebar. This makes it easy to browse, play back, and download multiple clips at once.
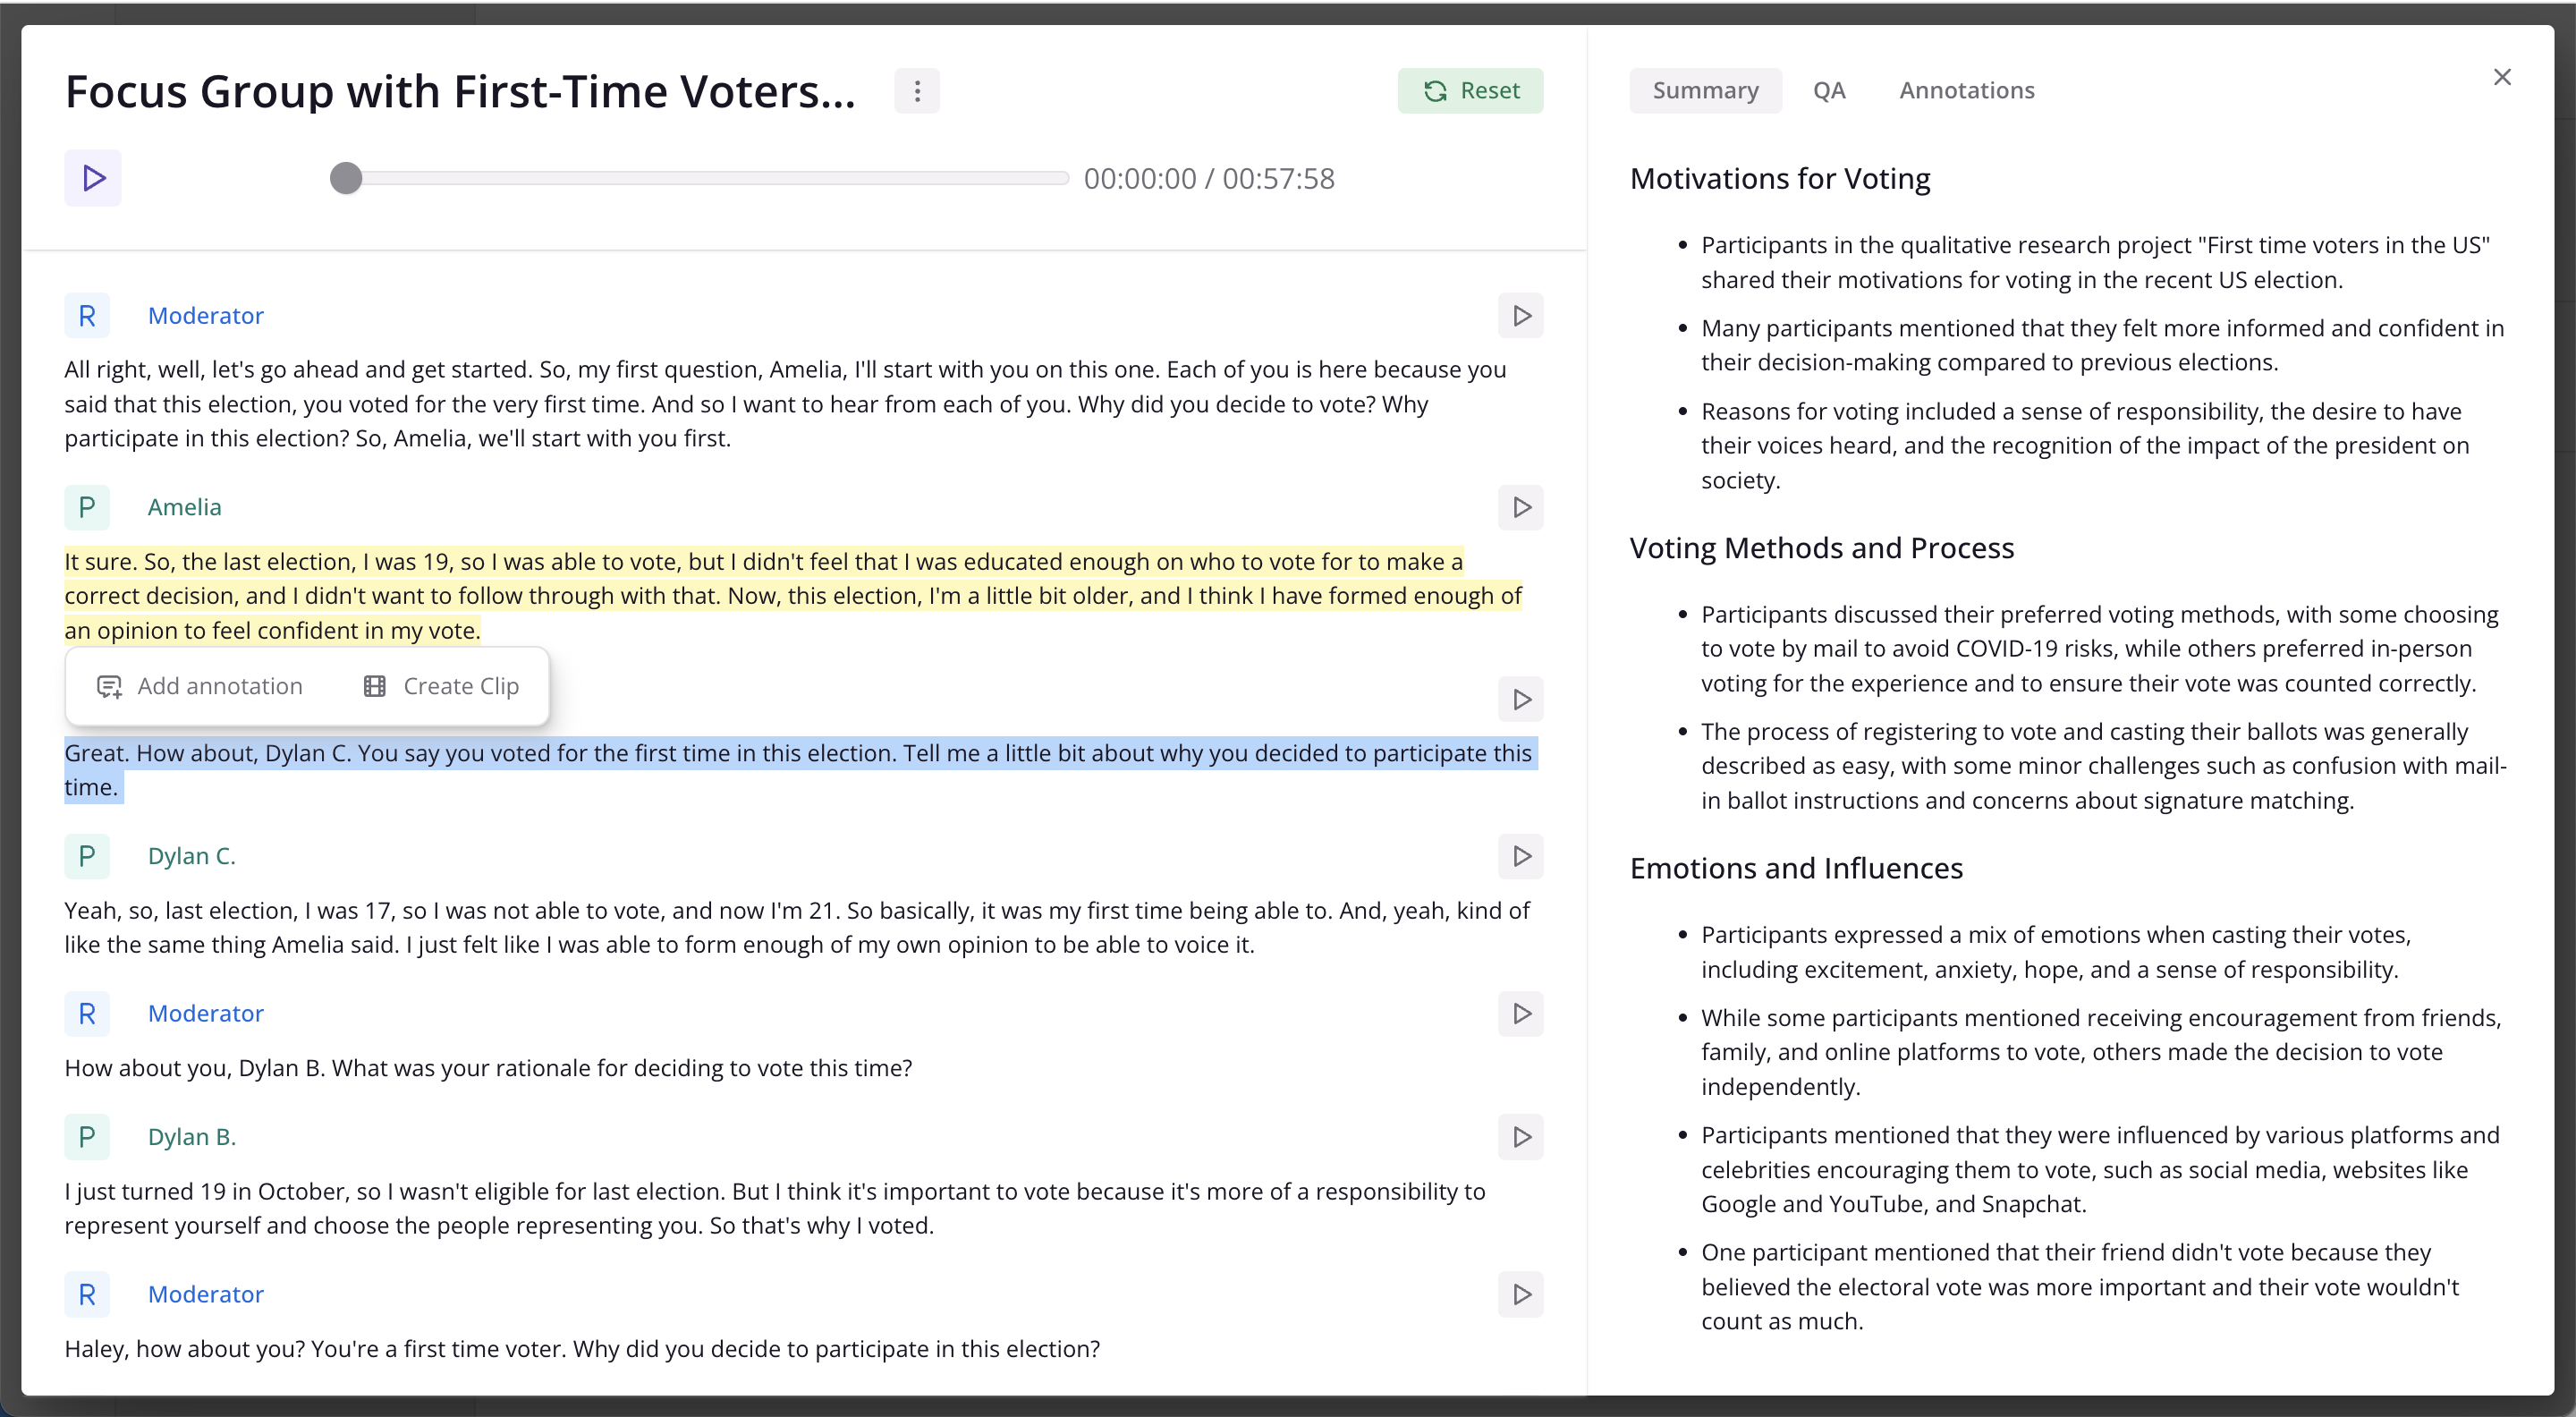
Confirm by selecting ‘Create Clip’ again in the bottom right corner of the video.
A message confirms the clip is being created. Click Clips & reels in the message to go straight to the Clips & reels section of your project. The clip appears there right away, marked Processing until it is ready to play.
From the Clips & reels section, you can:
Play back clips instantly.
Navigate back to the original transcript using the provided shortcut.
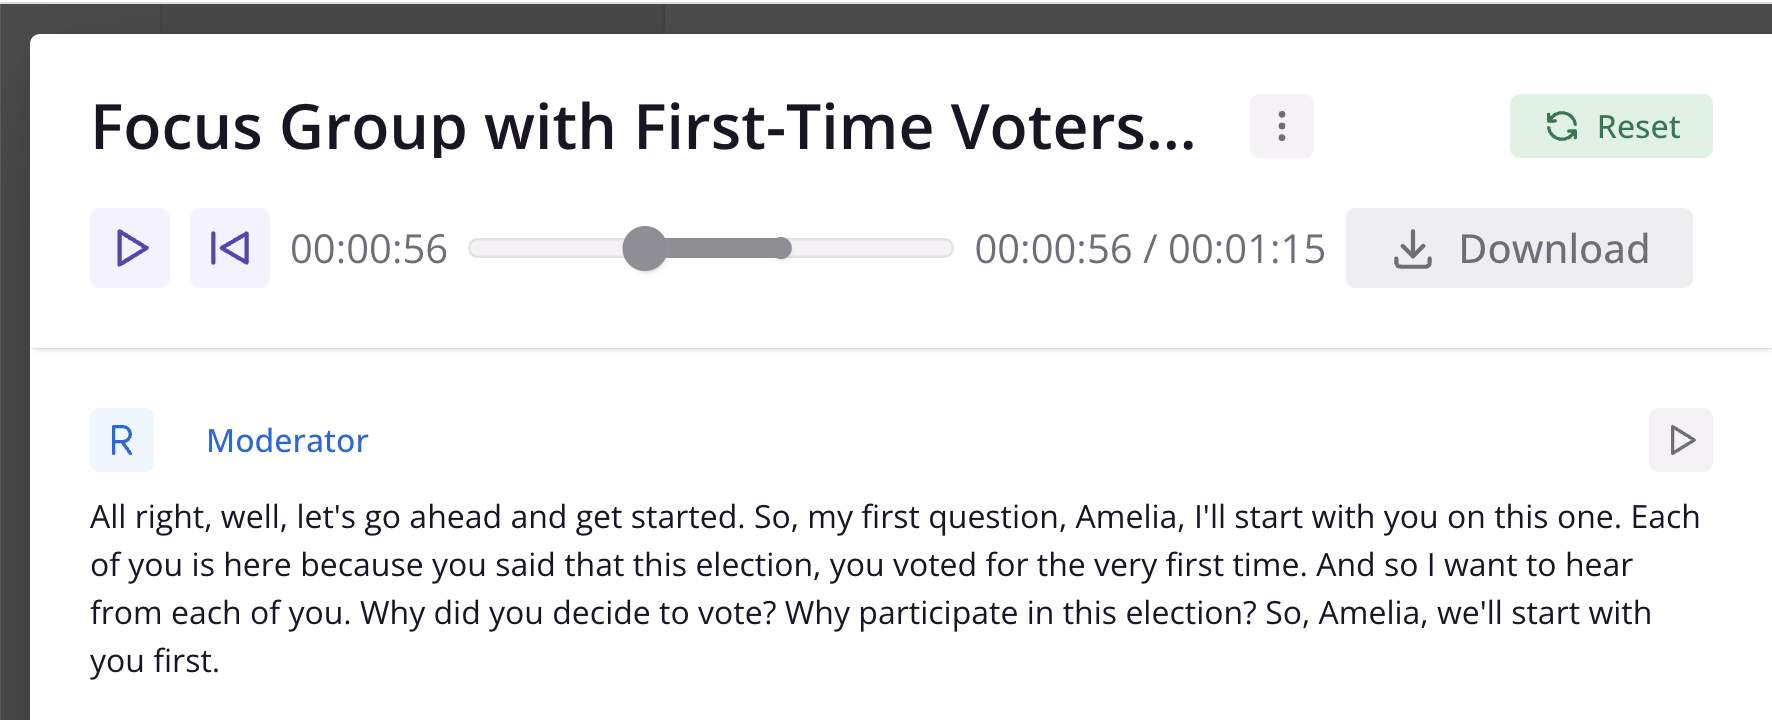
Download clips individually or in batches.
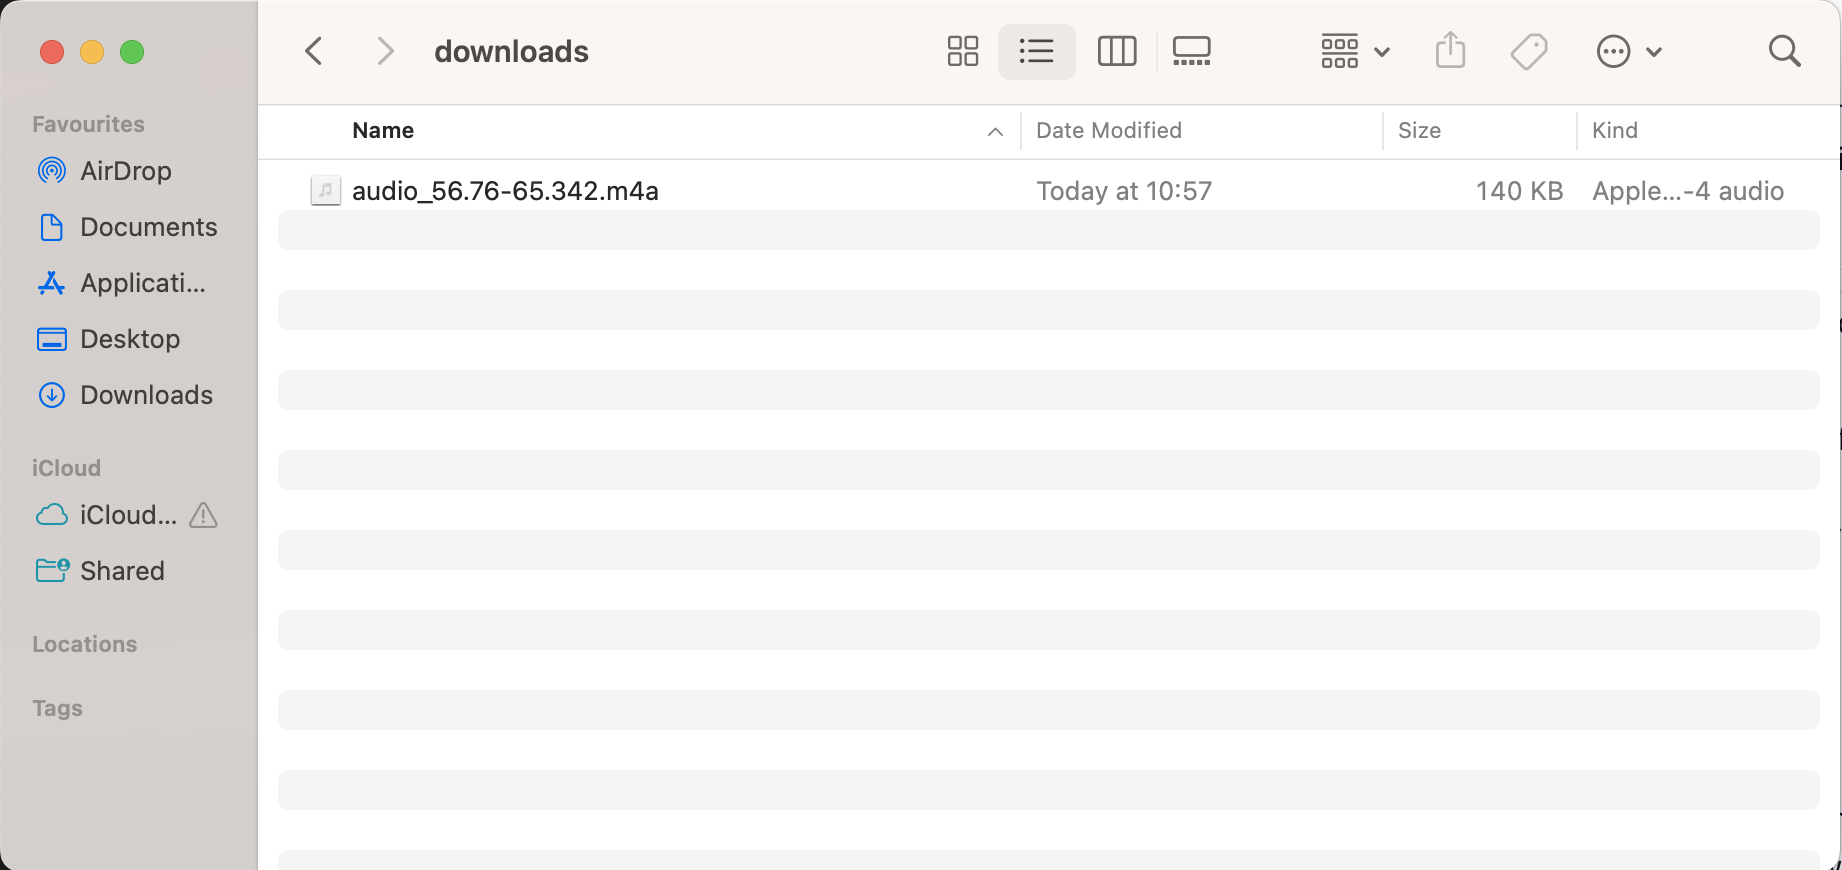
Downloads use the name you give your clip. CoLoop shortens long download filenames while keeping the file extension; your clip’s name in CoLoop stays unchanged.
To find all clips within an entire project, navigate to the Clips & reels library in the main left-hand sidebar.
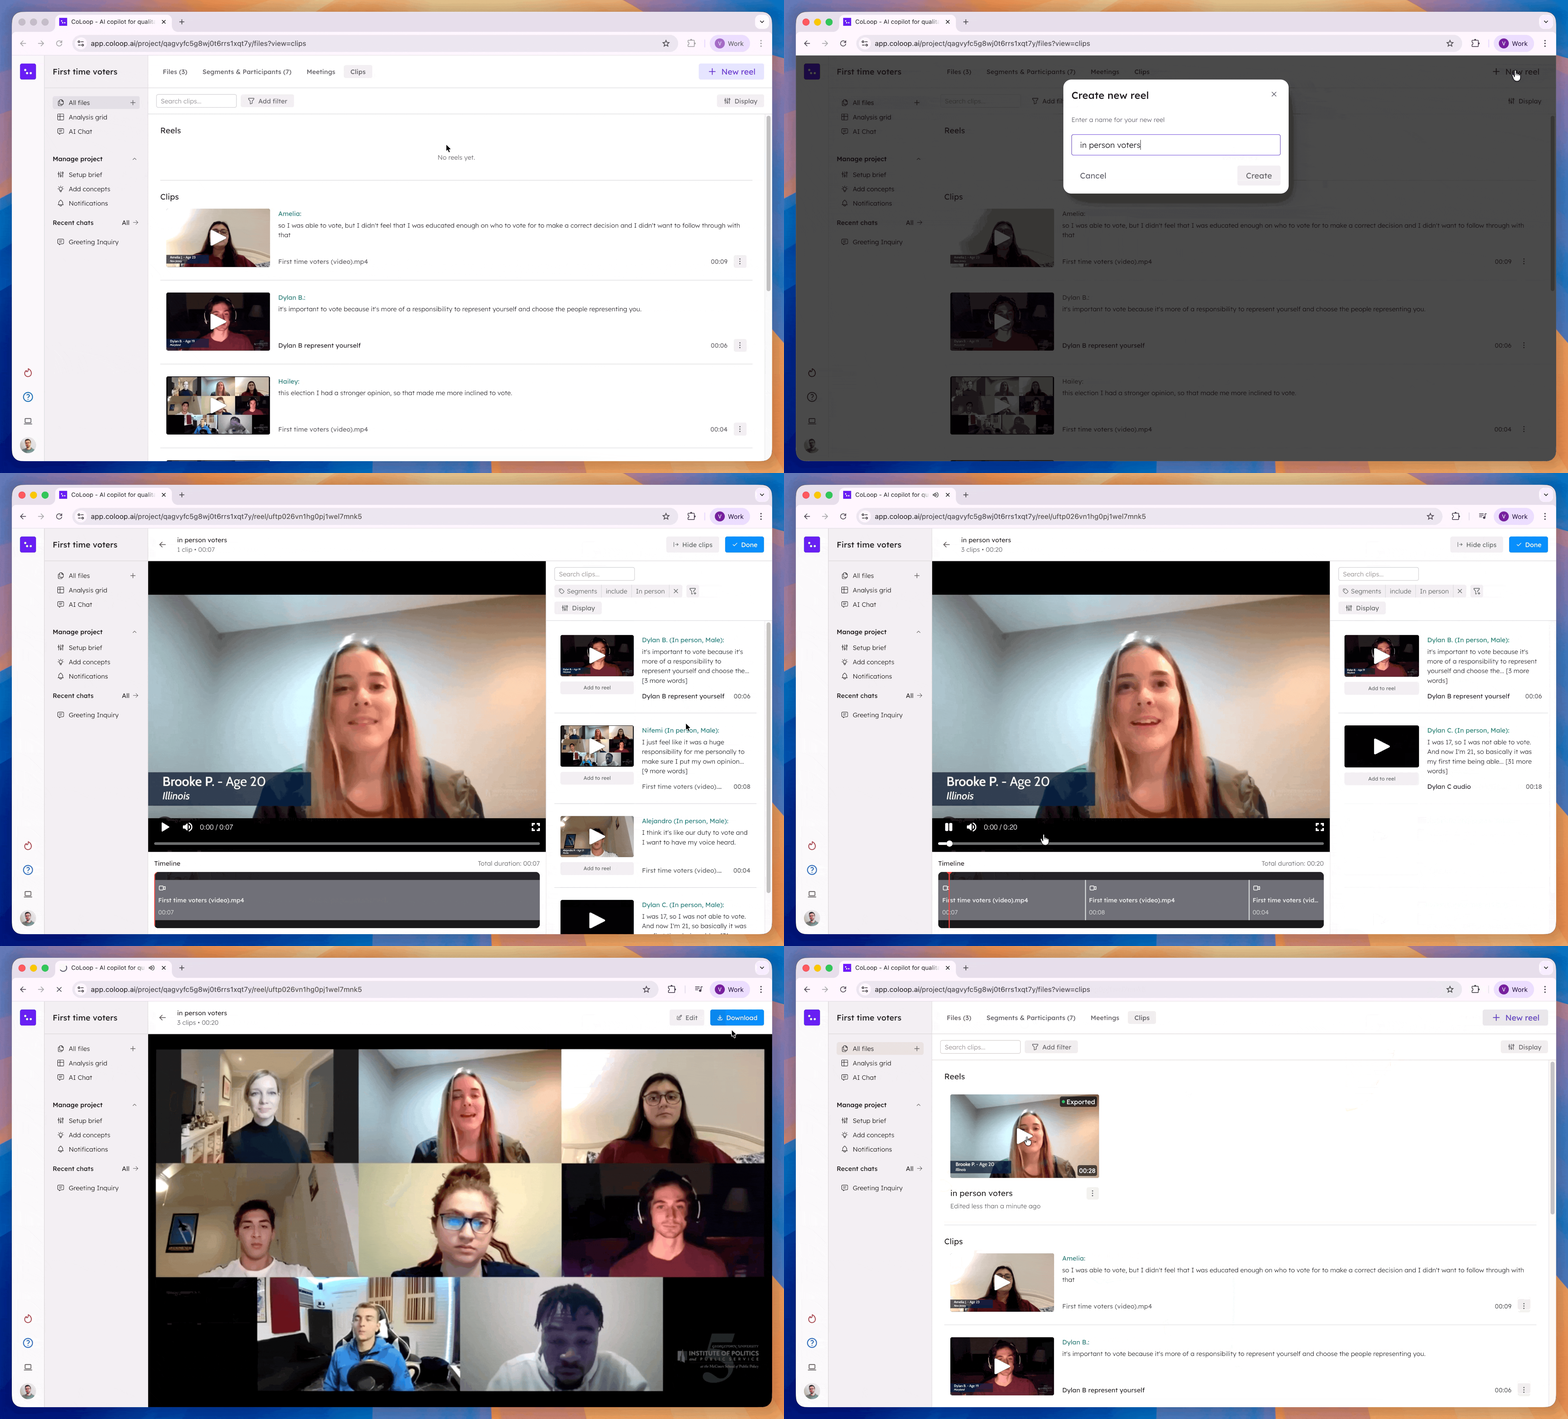
To create a reel, click + New reel at the top of the screen, or + Create video reel under Reels while the project has none. CoLoop opens a new untitled reel in the editor.
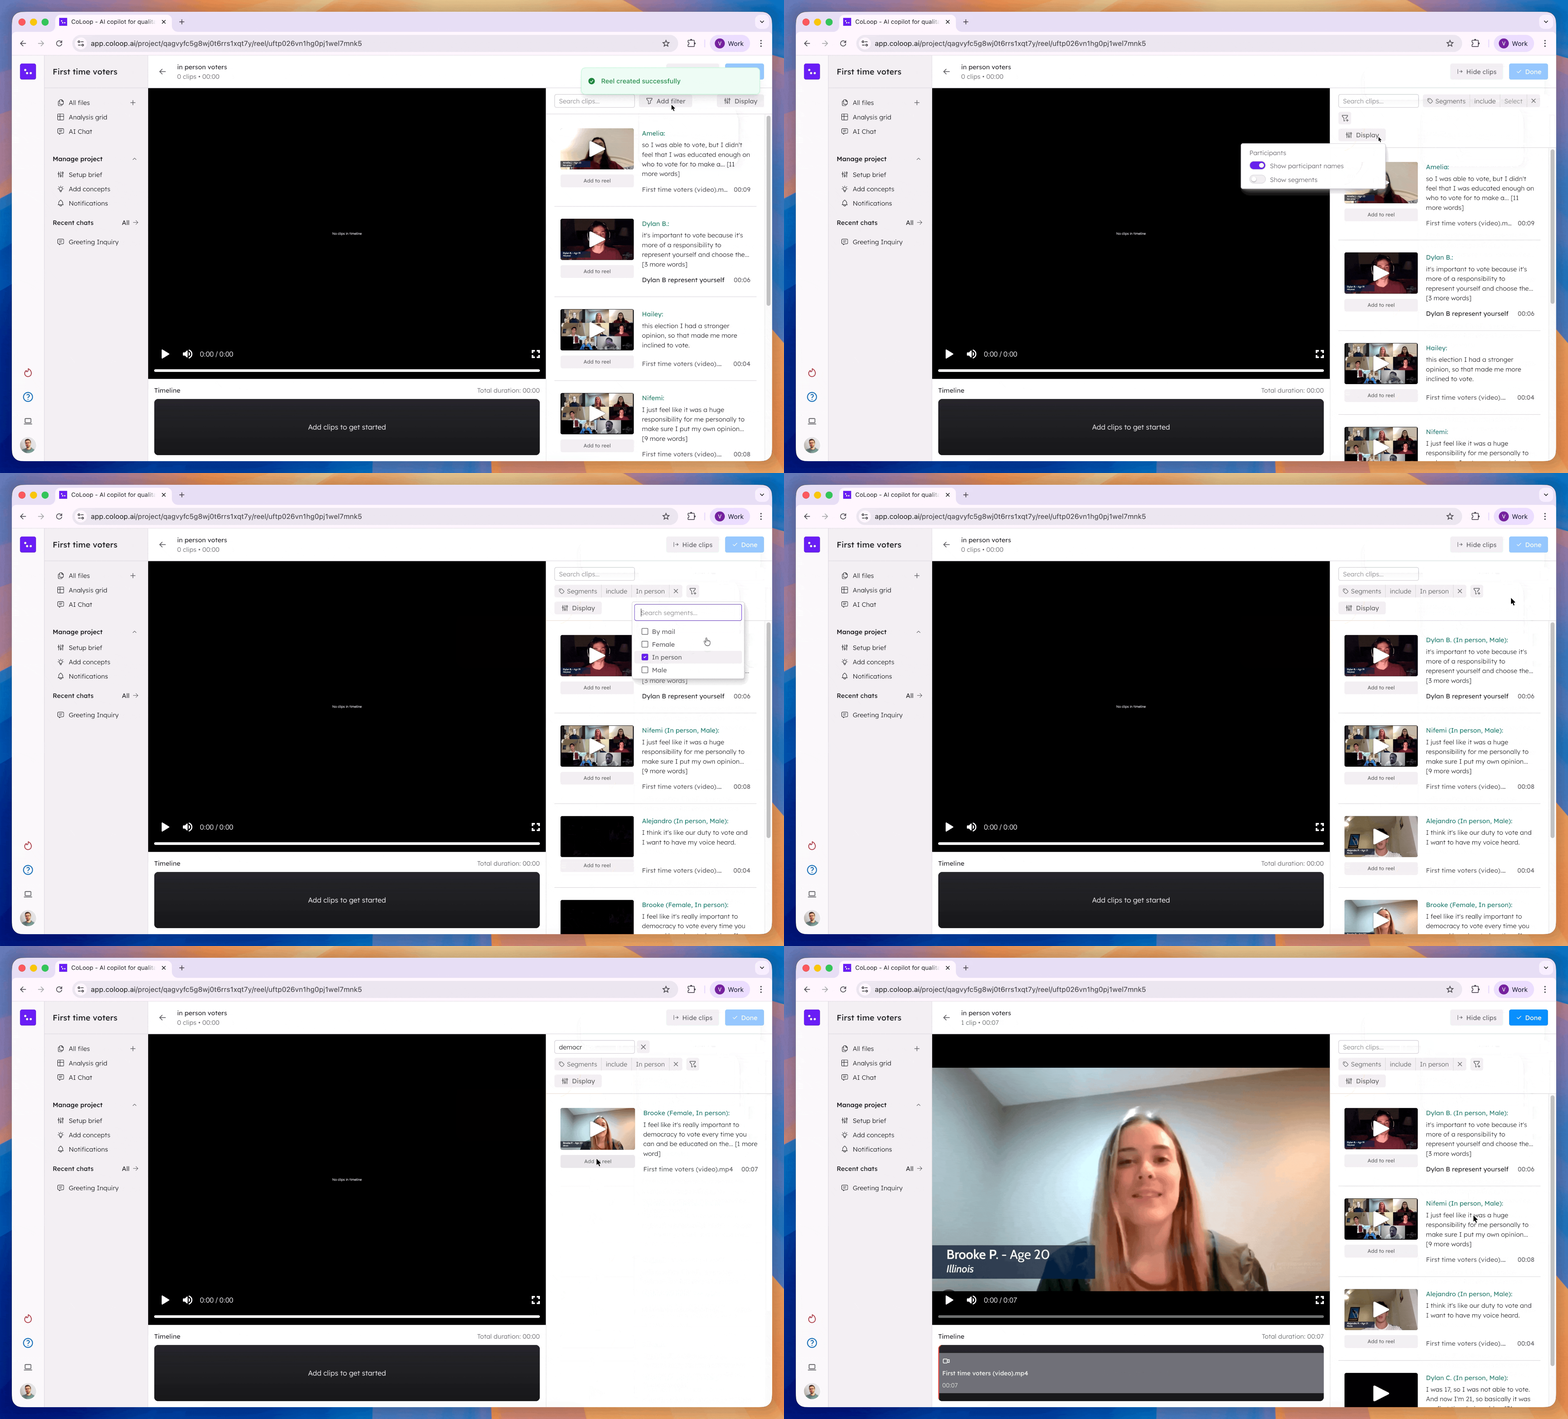
To add clips to your reel, click ‘Add to reel’, and that clip will appear in the timeline underneath the main video frame. You can drag clips around in the timeline to reorder. You can use any clips you’ve created in a project.
On the right hand side, search for key words or filter by segment or participant to bring up specific clips. With large datasets, it can be helpful to toggle participant names and segments on.
Filtering and searching for clips helps create videos covering specific topics or segments easily.
To add context or preamble between clips in a reel, hover over the timeline and click the + button at any point, including before the first clip or after the last. Choose Text to show a title card (for example, a theme name or research question) on a black background, or Image to upload a PNG, JPEG, or WebP (up to 5MB, at most 4000px per side). Set how long the card holds on screen (up to 60 seconds), then click Add card (or press ⌘↵, Ctrl+Enter on Windows). Cards appear in the timeline like clips: drag to reorder, or hover over one to edit or remove it. Cards render into the exported video exactly as shown in the preview, and stay sharp even when the video is blurred. Reels made only of audio clips normally export as audio files; adding a card (or burning subtitles) turns the export into a video, with audio clips shown as black frames.
Open Effects and select Blur entire video to obscure the full video frame in the exported reel. The editor shows an approximate preview. The final, non-reversible blur is applied during export. The Effects menu is available while a reel has unexported changes; for an already exported reel, click Edit first.
To blur only part of a clip, like a face or a screen, hover the clip in the timeline and click the shield icon (Blur sections). Draw one or more rectangles over the video, then save. The blur is baked into those regions of the exported reel and cannot be reversed in the export itself; the source video and clip are not modified. Clips with blurred regions show a shield badge in the timeline. To change or remove the blur, reopen Blur sections, adjust or clear the rectangles, and export the reel again.
Open Effects and select Modulate voices to disguise every voice in the exported reel. The export pitch-shifts the audio by a random amount fixed for that reel, so re-exports sound the same and the original voices cannot be recovered from the download. Combine it with a blur to hide both face and voice. It applies to audio-only reels too. The editor preview plays the original audio, so Voices modulated on export appears next to the Effects menu as a reminder of what the download will sound like.
Turn on Subtitles via the bottom right corner of the reel before exporting to burn subtitles onto the downloaded video. Click the translation icon next to the subtitle icon to choose the original language or an available translation, such as English. If you edit the transcript later, export the reel again to update the subtitles.
Open Effects and select Clip labels to burn a small label over each clip in the exported video. Choose any combination of the clip’s name (falling back to its file name), the names of the participants in the clip, and the segments of those participants (each on its own line), and pick which corner of the frame the label appears in. Clips with nothing to show (for example, speakers without segments) skip that line or are left unlabeled. Labels reflect each clip’s trimmed range: participants and segments you trim out of a clip are dropped from its label, and the same clip added twice with different trims can show different labels. While editing, the reel preview shows the label in place so you can check the content and corner before exporting. If you rename clips, change participants or segments, or adjust trims later, export the reel again to update the labels. Cards are not labeled.
Click Export.
When the export completes, download the finished reel from the editor or clip library.
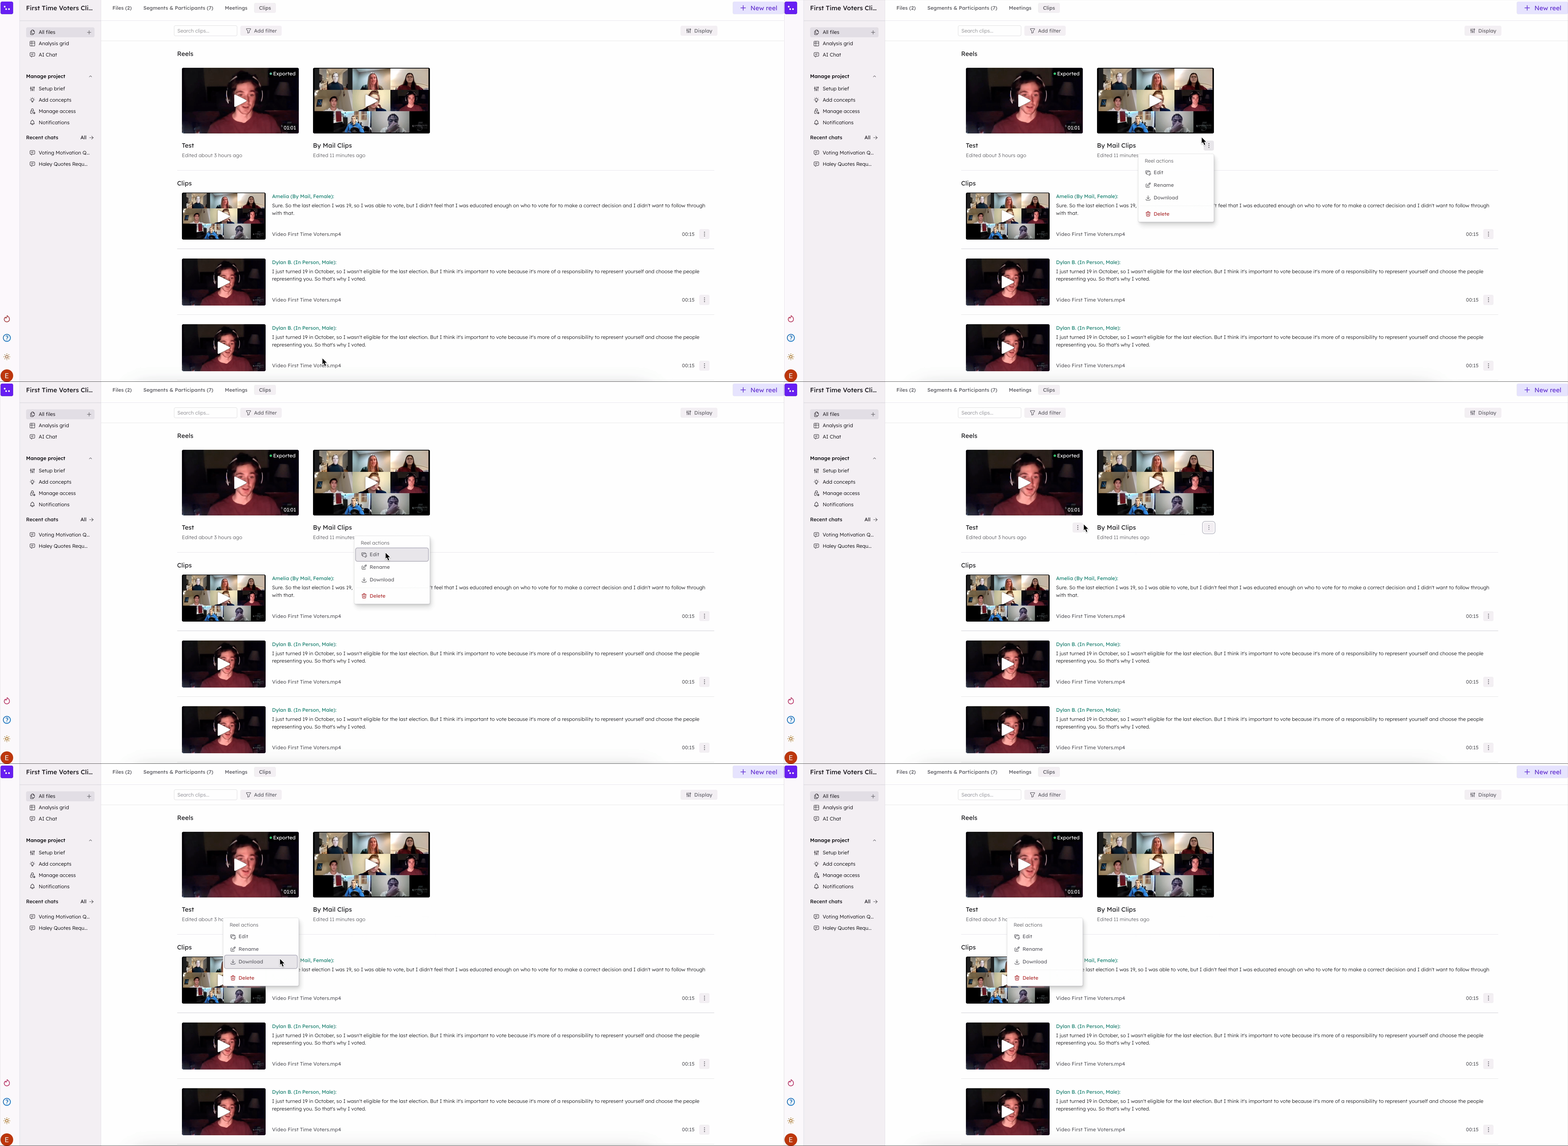
All reels remain available in the clip library. Draft reels must be exported before you can download or share them. Open the three-dot menu under a reel to edit, rename, download, or delete it.
Sharing a reel creates a public link. Anyone with the link can watch and download the reel without a CoLoop account. They cannot see your project, transcripts, or any other clips.A reel must be exported before you can share it. If you have changed the reel since its last export, export it again first.
Click Share — the button sits under every reel in the clip library and in the top-right corner of the reel editor.
Link — send this link to anyone; they can watch and download the reel in their browser. You can also paste it into Notion to embed the player, or add it to a Google Doc as a clickable link.
iframe — paste this iframe anywhere that accepts HTML, such as reports, dashboards, client portals, or company websites, to play the reel inline.
PowerPoint and Google Slides do not support embedded videos.To revoke access, click Share and select Stop sharing (also available in the reel’s three-dot menu). The link stops working immediately and cannot be reactivated — sharing again creates a new link.
A public link only serves the version of the reel you last exported. If the reel goes out of date (you edit its timeline, change an export option, or blur one of its source videos), the link stops working and the reel shows a Public (paused) badge in the clip library.Anyone opening a paused link sees a “not found” page. The link is not revoked, only paused: export the reel again and the same link starts working, now serving the updated version.
Because exporting a paused reel republishes its existing link, select Stop
sharing reel if you want access revoked for good.
Blurring a video is permanent: the blurred version becomes the only one served anywhere in CoLoop. Clips and reels made before the blur were cut from the unblurred video, so CoLoop withholds them until they have been rebuilt from the blurred version:
While the blurring runs, the reel’s public link returns “not found,” and you cannot export or download the reel.
Once the blurring completes, the reel is marked out of date and its link stays paused. Clips are re-rendered from the blurred video automatically and cannot be downloaded until that finishes.
Export the reel again to rebuild it from the blurred video. Its public link then resumes on its own, serving the blurred version.
If a reel draws on several videos, blurring any one of them pauses the reel.
Clip reels are great for boosting your deck and narrative with real voices from your participants.Top Tip: Use the chat feature to pull relevant quotes—a quick way to find great clips without combing through transcripts. When you open the evidence panel on a result, click Clip on any quote from an audio or video file to create a clip in one step. See Evidence Panels.
Was this page helpful?
Assistant
Responses are generated using AI and may contain mistakes.