API keys let integrations, scripts, and local tools access CoLoop without asking a user to sign in for every request. Each key is tied to the organization and admin who creates it.
CoLoop shows the full API key only once. Store it securely. If you need to give it to someone else, use a purpose-built secret-sharing tool instead of email, Microsoft Teams, Slack, or another messaging tool.

Who can manage API keys

Only organization admins can create and manage API keys. Each admin can see and manage only the keys they created. If you cannot manage API keys, ask an organization admin to create or update the key for you.

Open the API keys page

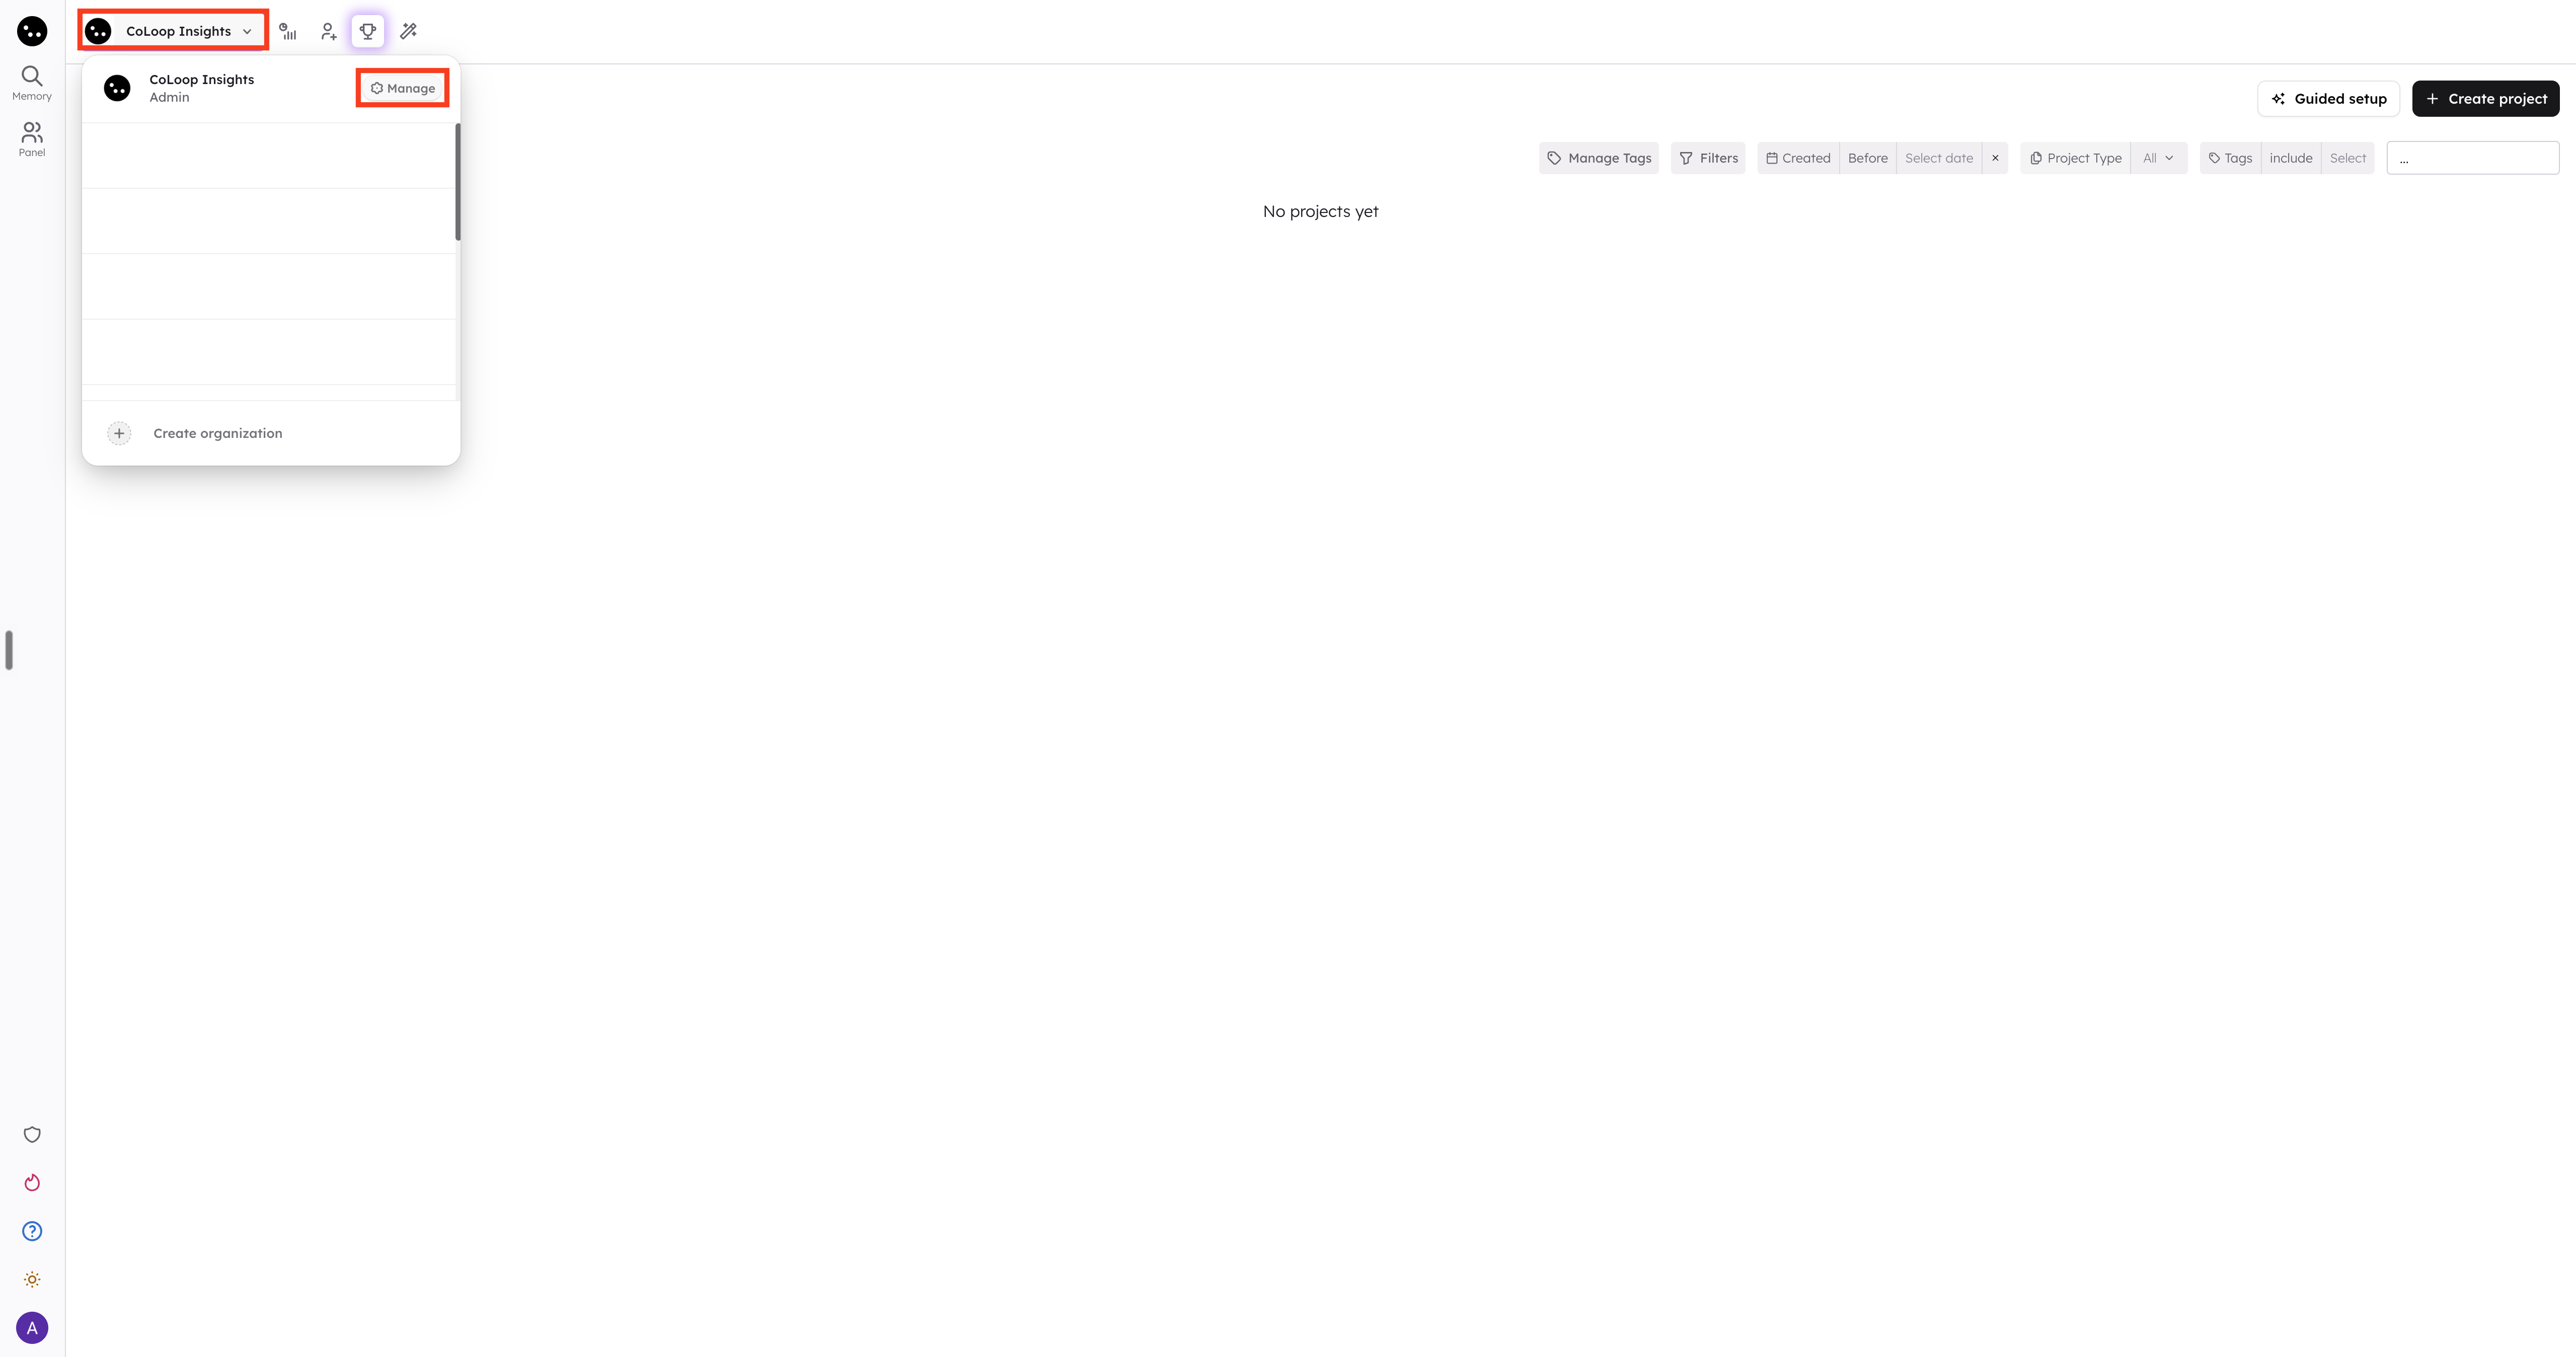
  1. Click your organization name in the top left.
  2. Click Manage.
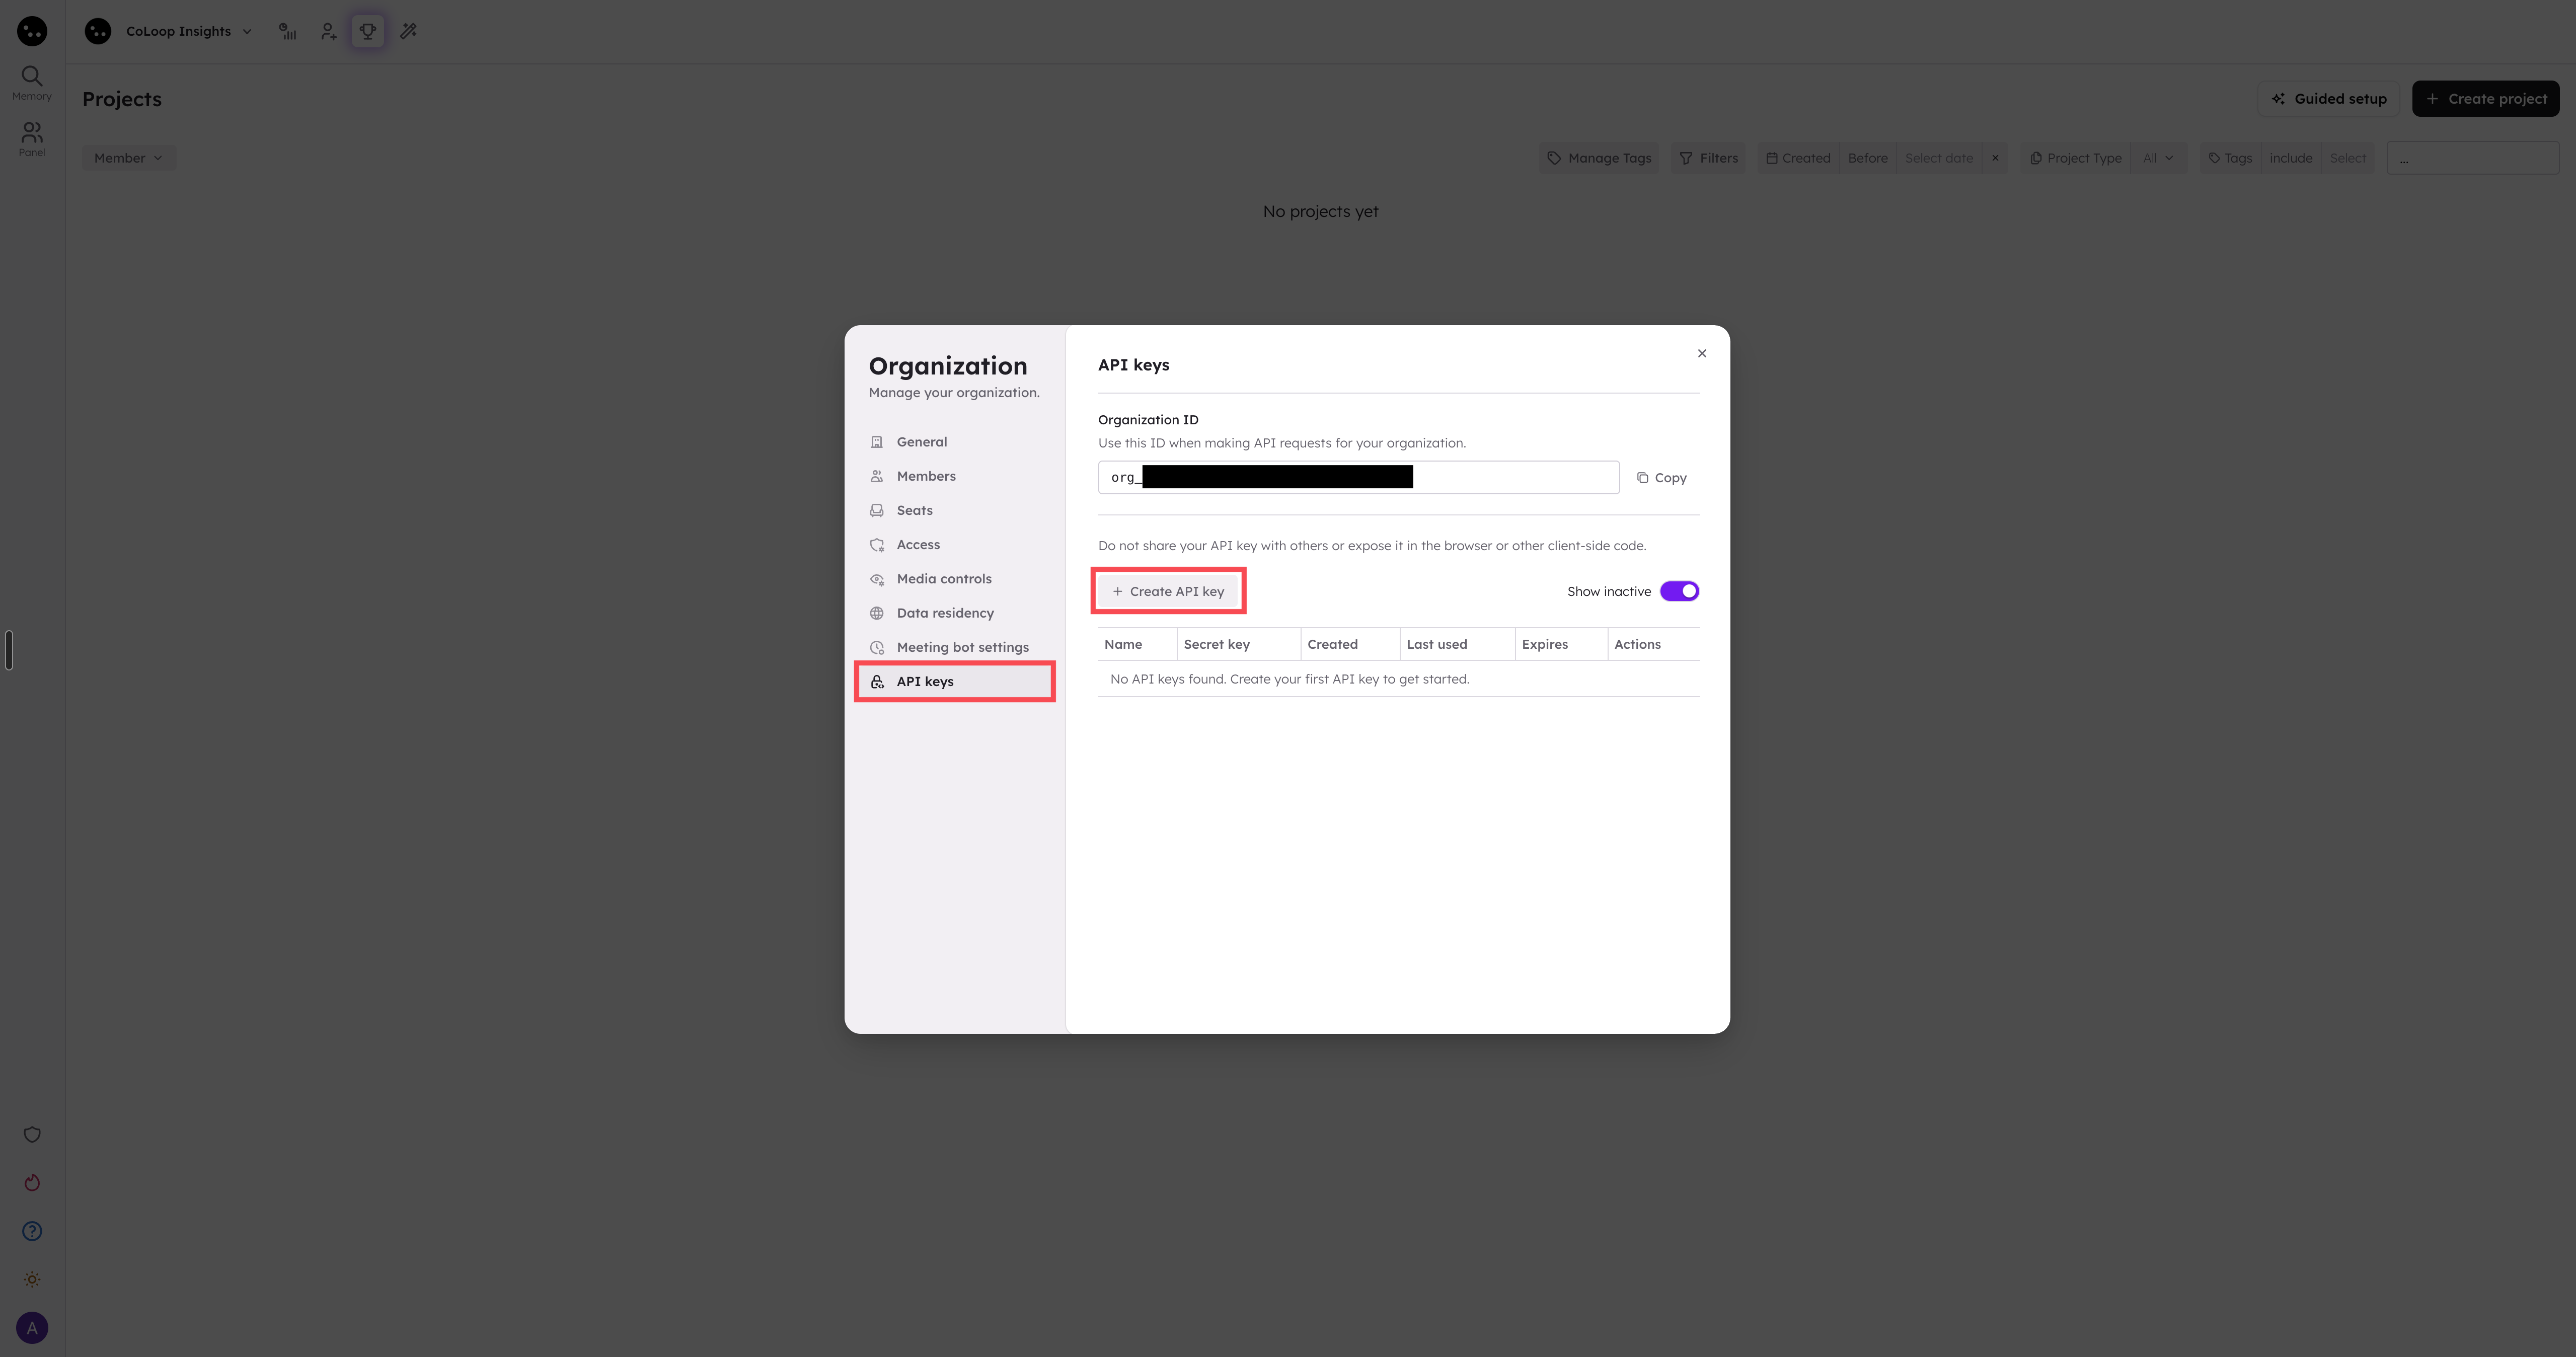
  1. Open API keys.

Create an API key

  1. Click Create API key.
  2. Enter a name that identifies where you use the key, such as Local data import.
  3. Click Create.
  4. Click Copy, then save the key somewhere secure.
  5. Click Done.
The new key appears in the API key list. CoLoop displays its prefix so you can identify it without exposing the full key.

Review your API keys

Use the API key list to check when each key was created and last used. Turn on Show inactive to include expired and revoked keys. CoLoop does not display the full key after you close the creation form. If you lose a key, create a replacement and revoke the lost key.

Rename an API key

  1. Find the active key in the API key list.
  2. Click the pencil icon in its Actions column.
  3. Enter the new name.
  4. Click the checkmark icon to save it.
Renaming a key changes only its name. The key continues to work without changes to your integration.

Replace an API key

Use this process when you need to rotate a key or no longer have its full value.
  1. Create a new API key.
  2. Update your tool or integration to use the new key.
  3. Make an API request and check that the new key’s Last used date updates.
  4. Revoke the old key.

Revoke an API key

  1. Find the active key in the API key list.
  2. Click the trash icon in its Actions column.
  3. Check the key name in the confirmation dialog.
  4. Click Revoke.
The key stops authenticating API requests and cannot be restored. Turn on Show inactive to view it after revocation.