

Client AI sharing is rolling out gradually, and only organization admins can
create and manage shares. If you’re an admin and don’t see Client AI
sharing in your organization settings, contact support to have it enabled.
Before you start
- You need to be an admin of your CoLoop organization.
- Each project you share needs a report: the final deck you delivered, as a PDF or PowerPoint (.pptx) file. Clients’ answers come only from the report, so a project without one can’t be asked about. You can add reports while you create the share.
Create a share
Click your organization icon in the top left, click Manage, then open Client AI sharing and create a new share.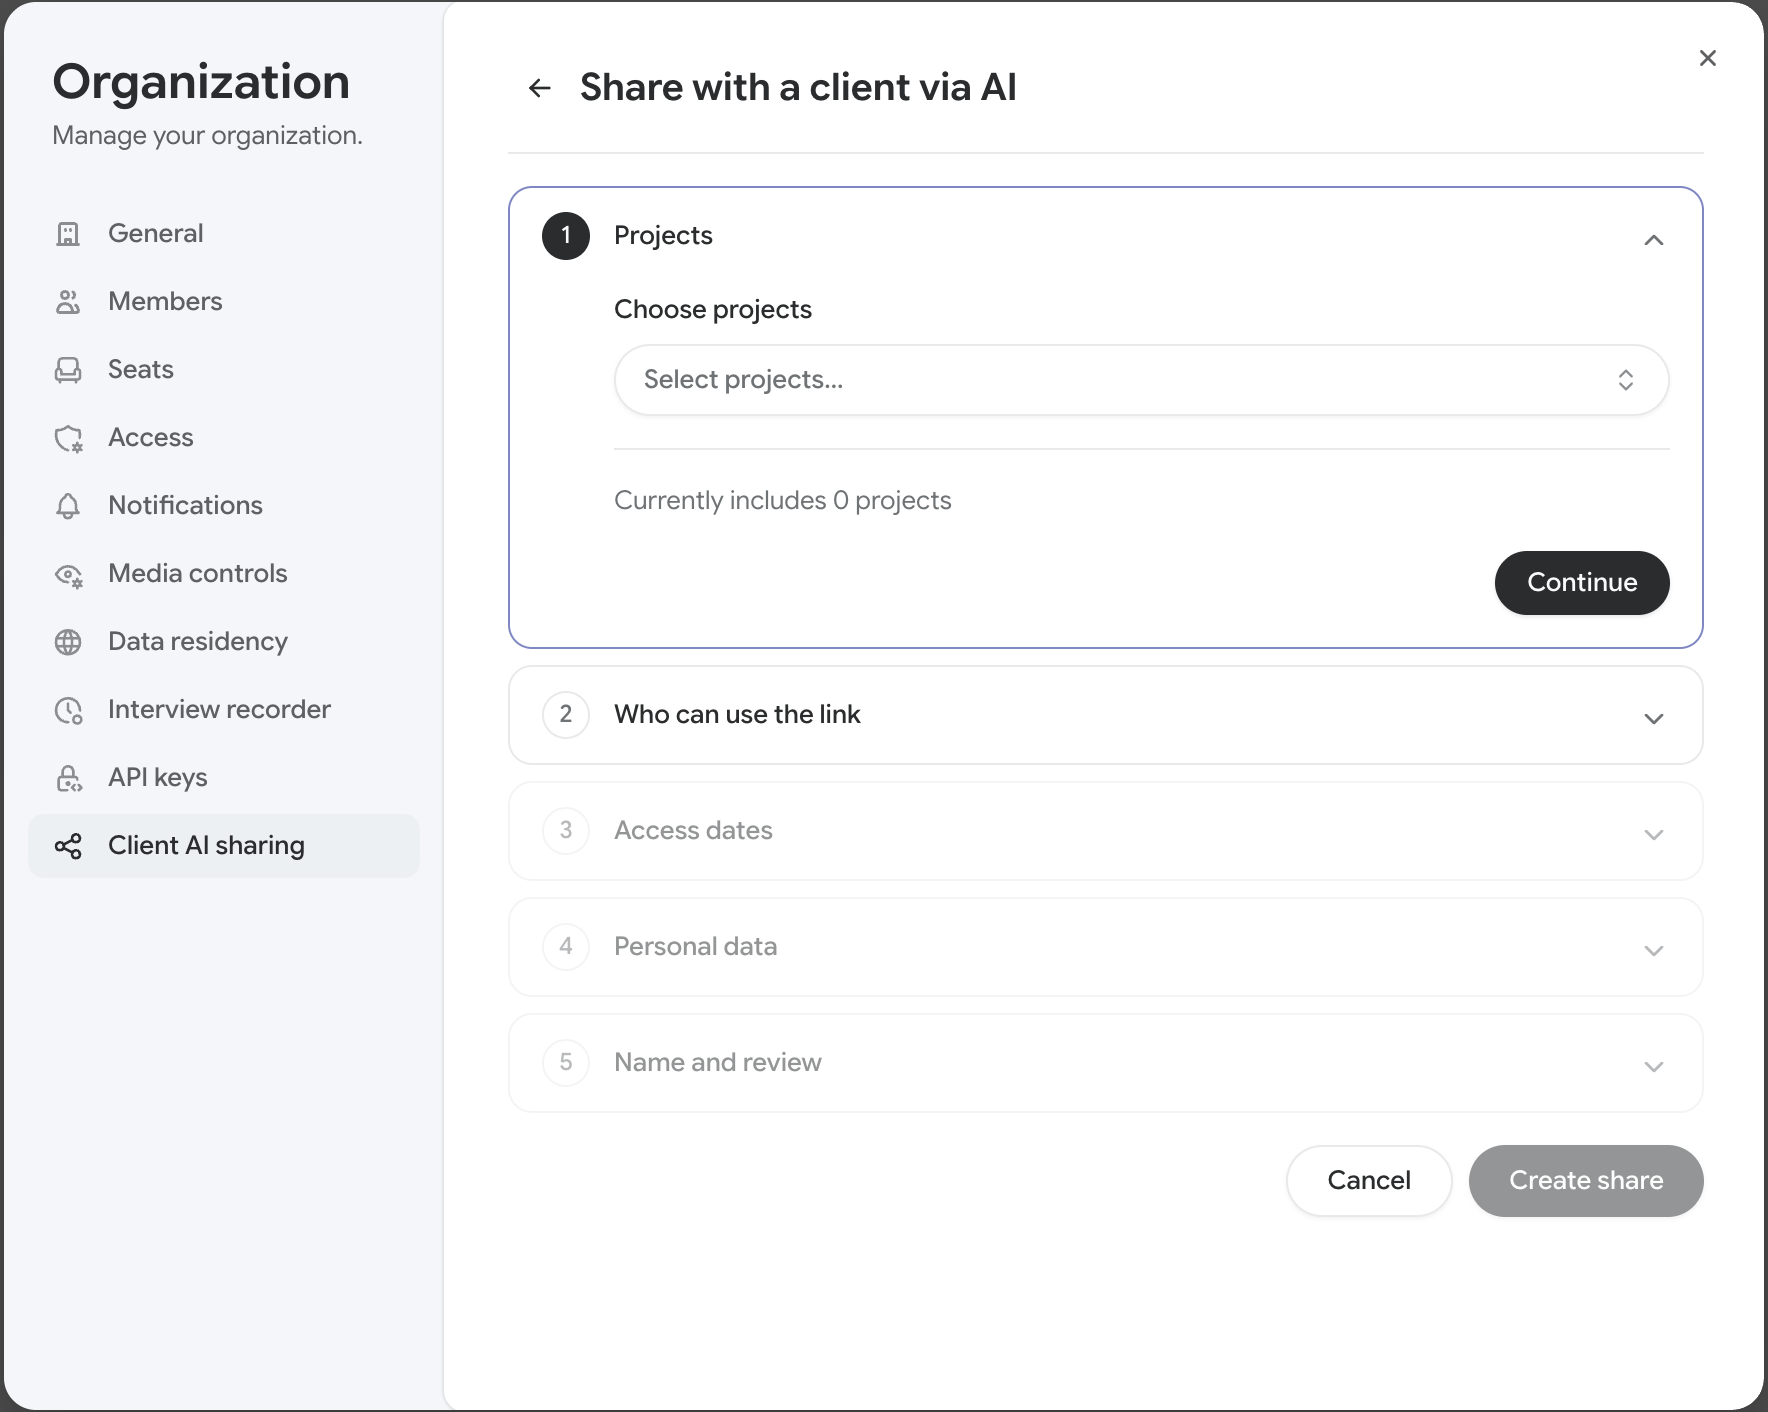 The share is set up in five steps. Click Continue to move to the next one.
1. Projects
- Under Choose projects, select the projects to share.
- Optional: under Also include by field, pick project field options. The share then includes every project with any of those options, including projects you tag later.
- Check Shared projects for a report on each project. For any project without one, click Add report and choose the PDF or .pptx file, or drag the file onto the project’s row.
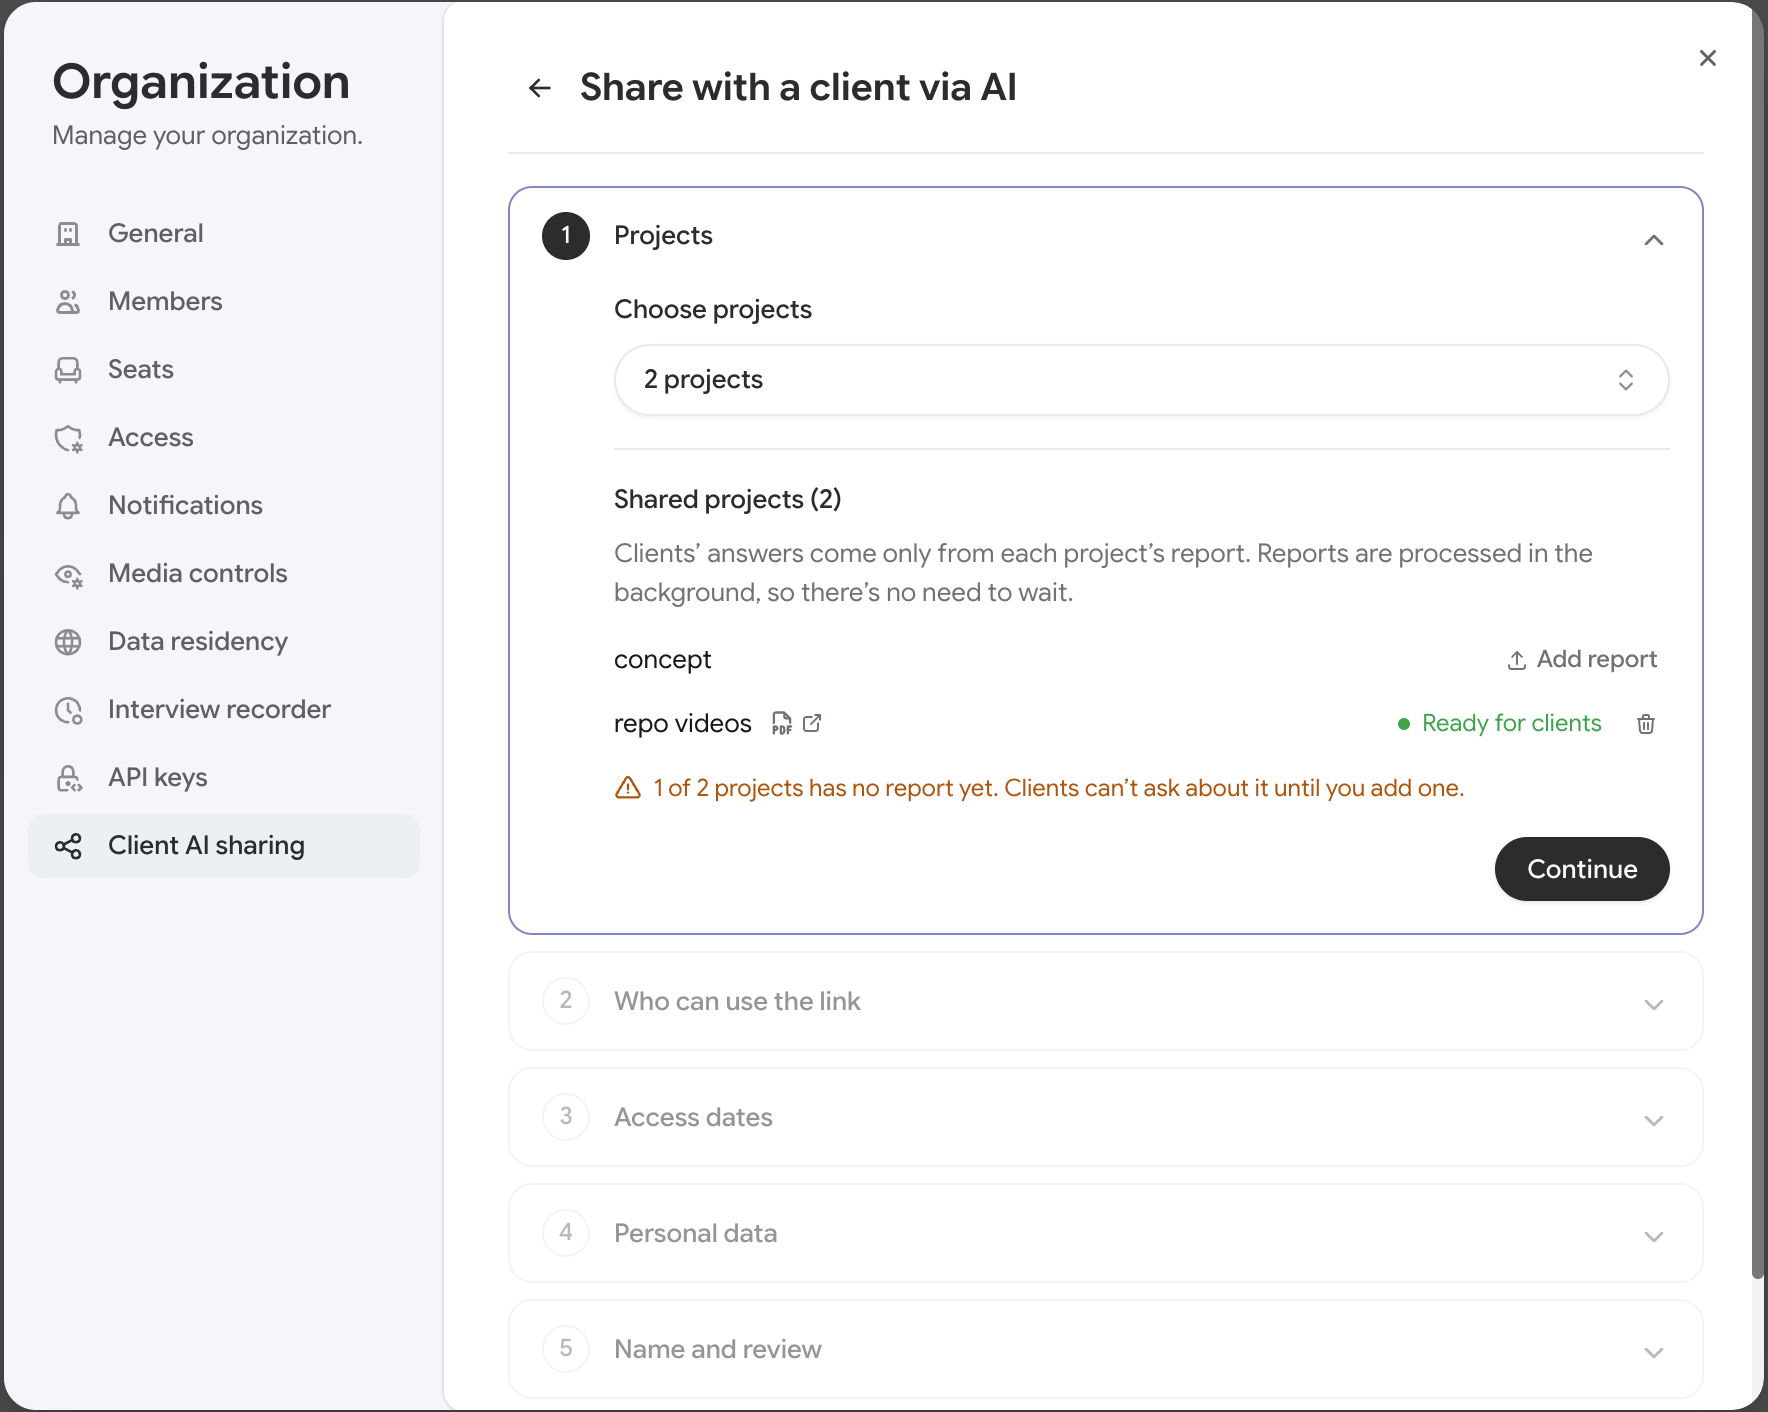 A report you add belongs to the project, not the share. Removing it affects every share that includes the project.
2. Who can use the link
Type the email addresses or domains that are allowed to use the link, and press Enter after each one.- An email address, such as
jane@brand.com, lets that one person in. - A domain, such as
brand.com, lets in anyone with an email address at that exact domain. Subdomains, such asuk.brand.com, need to be added separately.
3. Access dates
- Access ends: the last day anyone can use the share. After this date, every client loses access.
- Link expires: the last day new people can join with the link. People who already joined keep access until Access ends. If you leave this empty, the link expires when access ends.
4. Personal data
Choose what to hide from clients in quotes and clips:- Types to redact: the kinds of personal data to replace in transcripts, such as ages or locations.
- Hide names: show speakers by session code, such as
IDI-07-B, and replace names in the transcript with[PERSON_NAME]. - Blur videos: blur the full video in any clip the client can watch.
- Modulate voices: shift the pitch of every voice in any clip the client can hear.
5. Name and review
- Enter a Name for the share, such as the client’s team. Only your team sees this name.
- Check the summary of each step. Click Edit next to any step to change it.
- Click Create share.
Send the link to your client
After you create the share, CoLoop shows the Share link and a Suggested email.- Click Copy link, or edit the suggested email and click Copy email.
- Send it to your client.
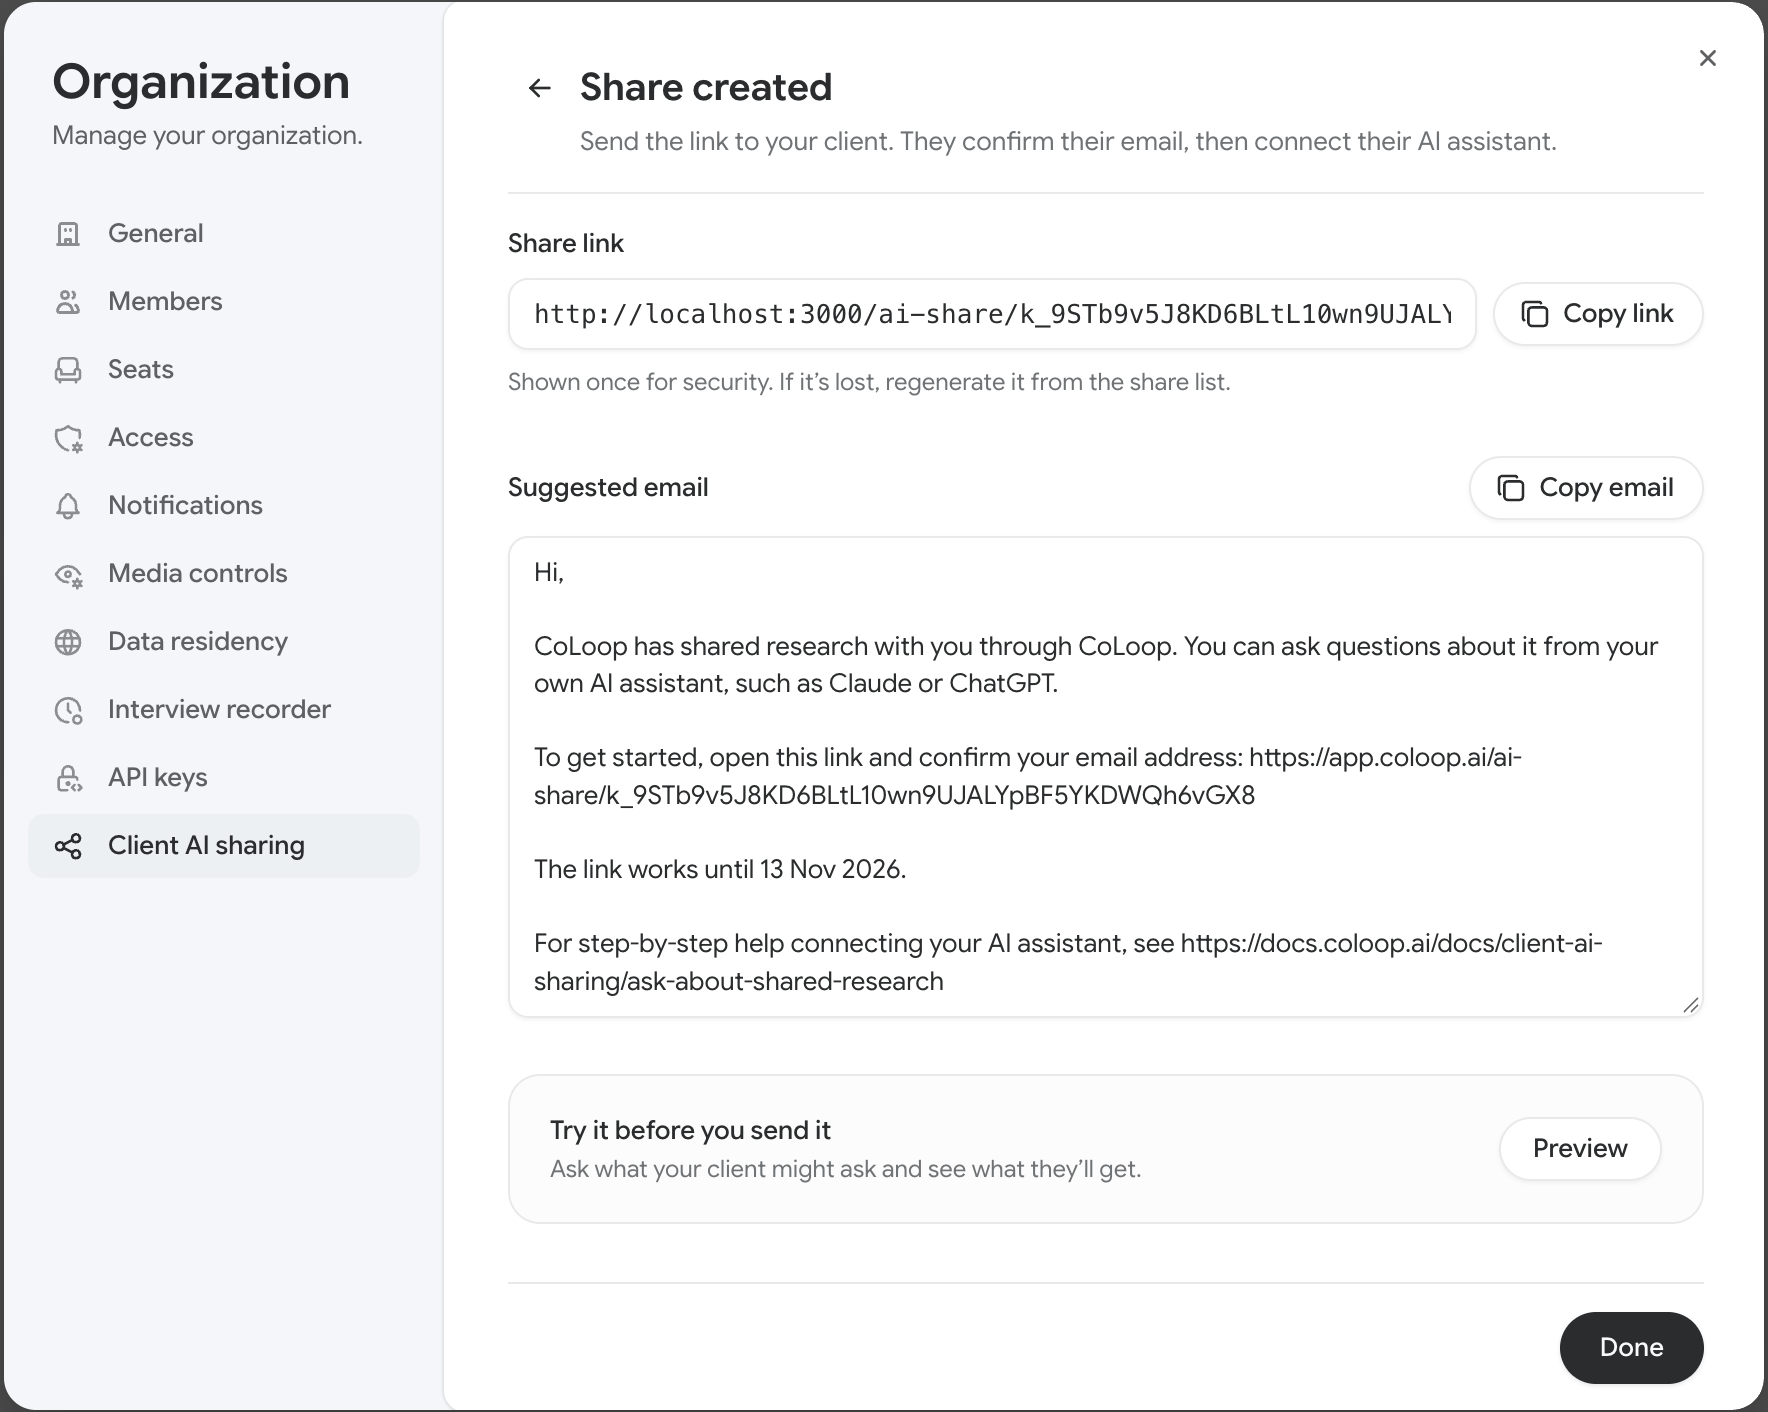 Your client confirms their email on the link’s page, then follows the steps for their AI assistant. Point them to Ask about shared research from your AI assistant if they need help.
Try it before you send it
Click Preview to ask the questions your client might ask and see the answers, quotes, and clips they’ll get, with the share’s redaction applied. You can preview from the Share created panel, or from the share list at any time until access ends. When redaction is on, CoLoop prepares a redacted copy of each file in the background. While the share shows Preparing, answers still come from the report, but some quotes and clips may be missing.Manage your shares
To see every share, click your organization icon in the top left, click Manage, and open Client AI sharing. The list shows each share’s status and how many people have joined.
Open the ⋯ menu on a share to:
- View details: see the projects, who can use the link, the personal data settings, and the people who joined, with when each last used it.
- Preview: ask questions as your client would, until access ends.
- Edit: change the projects, audience, dates, or personal data settings. Changes apply immediately. Removing an email or domain removes those people’s access.
- Regenerate link: replace the link if it was lost or sent to the wrong person. The old link stops working. People who already joined keep their access. This is available for Active shares only. If the link has expired, edit the share and set a later Link expires date instead.
- Duplicate: start a new share with the same settings and a new link.
- Revoke: end access for everyone immediately. The link stops working for good. To share again, duplicate the share instead.
Troubleshooting
A client says they can’t ask about a project. Check that the project’s report shows Ready for clients in the share’s projects step. A project without a report can’t be asked about. If a report failed to process, click Try again on its row. A client is told their email isn’t on the list. Edit the share and add their email address or domain under Who can use the link. Check that they’re using the same address you added. A client says the link has expired or is invalid. Check the share’s status:- Link expired: edit the share and set a later Link expires date.
- Active: the link may have been regenerated. Send them the latest link, or regenerate it if you no longer have it.
- Ended: edit the share and set a later Access ends date. If they haven’t joined yet, set a later Link expires date too.
- Revoked: duplicate the share and send them the new link.